


by Anita Houston

Witches Brew Thickboard Tag by Anita Houston
- Materials
- Instructions
- Ranger Texture Paste : Opaque Crackle, Opaque Matte
- Embossing Powders : Black Sparkle
- Wendy Vecchi Embossing Powder : Orange Blossom
- Tim Holtz Distress® Mixed Media Heavystock
- Archival Ink™ #0 Pads : Jet Black, Pale Ochre, Majestic Violet
- Dylusions Cling Mount Stamps : Legs Eleven
- Ranger Multi-Medium : Matte
- Ranger Mini Blending Tool with Foam
- Archival Ink™ Designer Series: Wendy Vecchi : Orange Blossom, Potting Soil, Watering Can, Leaf Green
- Ranger Enamel Accents : Grape Soda, Cheese Puff, Black Tie
- Liquid Pearls™ : Brass
- Ranger Glossy Accents™
- Ranger Acrylic Paint Dabbers : Black Tie
- Wendy Vecchi 1 oz. Mica Sprays : Pearl, Buttercup
- Fude Ball Pen : Black
- Ranger Non-Stick Craft Sheet™
- Ranger Craft Squeegee
- Ranger Heat it™ Craft Tool
- Ranger Adhesive Strips
- Ranger Adhesive Foam Rolls : Black
- Stampers Anonymous Studio 490 Wendy Vecchi Mat Minis: Get Mugged, Autumn Essentials, Tiny Stars
- Stampers Anonymous Studion 490 Wendy Vecchi Stamp Set: The Voice of Art, Domestic Art, Sunshine and Art, Autumn Art
- Stampers Anonymous Tim Holtz Etcetera Thickboard Tag: Small
- Blossom Bucket Studio 490 Wendy Vecchi Embellish Your Art: Small Funky Glasses, Mini Lips
- Tim Holtz Idea-ology: Long Fasteners, Adornments: Treasures, Broomsticks, Halloween Typography
- Dreamweaver Studio 490 Wendy Vecchi Embossing Paste: Black
- Stampers Anonymous Studio 490 Wendy Vecchi Stencil For Art: Stitching Template Circle Frames
- Scrap of White Tissue Paper
- Black Tulle
- Scissors
- Stamping Block
- Tweezer
- Paintbrush
- Craft Pick
- Stylus Tool
Instructions

Step 1: Spread a thin layer of Crackle Texture Paste onto the surface of the Thickboard Tag, using a Craft Squeegee, and go different ways to create texture. The heavier you put it on, the more cracks you will get. Clean the sides of the tag, do the same to the tag hole, and set these aside to dry.

Step 2: Punch the shorter coffee cup and a saucer from the Get Mugged Mat Minis, and two smaller pumpkins from the Autumn Essentials Mat Minis.
Using your finger, spread a thin layer of the Black Embossing Paste over the cup and saucer. A little goes a long way. Using a scrap piece of paper, pour Black Sparkle Embossing Powder over these, and shake off the excess. Set these aside to dry, and pour the remaining powder back into the jar. Repeat the process on the two pumpkins, except this time use the White Opaque Matte Paste, and Orange Blossom Embossing Powder. Set these aside to dry as well.

Step 3: Using Jet Black Archival Ink and Mixed Media Heavystock, stamp three images of the lady from the Voice of Art set, one of the witches hat from the Domestic Art set, and one of the suns from the Sunshine and Art set. Stamp the legs on a piece of white scrap tissue paper. One the legs dry, spread a thin layer of Multi Matte Medium onto a clean portion of the Heavystock. Turn the legs over on the reverse side, and lay the image into the medium, spreading the legs gently so no wrinkles are present. The reason for the reversal is because the regular image of the legs are going the wrong way for the lady to be sitting correctly, so the reverse side of the image will have them going the correct way. You can do this with any stamp without script on white tissue paper. Let the legs dry.

Step 4: Cut the hat and legs out as they are, the face only from the sun. For the lady, you will only need to cut out certain portions to make her a moveable type doll. Cut her head and body out, then two right upper arm portions (Since the upper left arm is not showing enough, the right arm will work just fine.), one right forearm and hand, and one left forearm and hand.

Step 5: Being careful not to get any on the hands, ink over the bodice, upper arms, and lower arms with Mystic Violet Archival Ink and a Mini Ink Blending Tool. Ink over the sun, now turned moon, with Pale Ochre Archival, and the legs with Orange Blossom Archival. Ink the edges of the bodice and arms with Jet Black. Lay the pieces out to make the moveable doll, and using a Craft Pick, poke holes through both shoulders, the top and bottom of the upper arms, and the top of the lower arms. Join all the pieces together with Long Fasteners.

Step 6: Ink the top portion of the hat with Jet Black Archival, and using the scrap paper, pour more Black Sparkle Embossing Powder over this. If you get any powder where you don’t want it, use a detail paintbrush to brush it off. Heat to emboss, and when cool, ink the lower portion of the hat, add powder, and emboss. It’s easier to do both parts separately. Ink both shoes, add the same powder, and heat emboss those. The cup, saucer, and pumpkins should be dry, so heat emboss those as well. Using Embossing Paste under Embossing Powder makes for awesome texture…just make sure the paste is air dried first. Ink the edges of the legs, hat, cup, and saucer with Jet Black.

Step 7: Lay the smaller pumpkin stamp on the Craft Mat, and ink it up with Potting Soil Archival. Lay the pumpkin down, embossed side down, on the stamped image and press firmly. Gently lift. Repeat with the other. Lightly dry them with the Heat Tool. Ink the edges as well, and thin ink only the stem with Leaf Green Archival. Lightly rub the Orange Blossom Archival over the pumpkin parts, directly from the pad to highlight the texture even further. Lightly dry.

Step 8: Use a piece of scrap paper to join the cup and saucer together, by adhering the paper to the back of both pieces using Multi Matte Medium. It will make it easier later to do this now. Adhere one pumpkin to the witches face, and the other pumpkin to the center of the coffee cup using Multi Matte Medium. Color in the ribbon around the hat with Grape Soda Enamel Accents, and the buckle with Brass Liquid Pearls, straight from the bottle working slowly. Adorn the bodice with buttons with the Grape Soda, by squeezing out a tiny amount of the enamel onto the Craft Sheet, and pick it up with the fine point end of a stylus to make the tiny dots. Using the stylus makes making the tiny dots muck easier than squeezing from the bottle. Do the same thing on the dots on the tops of the shoes using Cheese Puff Enamel Accents. It’s addicting to make these tiny dots. Let these dry.

Step 9: Adhere the hat to the top of the witches head with Multi Matte Medium, and then adhere the glasses and lips on the face of the pumpkin as well. I used Glossy Accents on the glasses and lips, as the tip was easier to use on the small parts. Fill in the eye portions of the glasses with Black Tie Enamel Accents, and let dry. Adorn the points of the glasses with more dots of Brass Liquid Pearls. Lay the wand onto the pad of the Potting Soil Archival, and rub it over it to color the wand. Dry with a Heat Tool, and then adhere the wand to the witches left hand with Multi Matte Medium. Apply a tiny bit of Brass Liquid Pearls to the star area of the wand. Let all this dry.

Step 10: Taking the Thickboard Tag again, ink over it lightly at first, starting with Pale Ochre in the upper right portion, in a circular pattern. Follow that with Orange Blossom, continuing into the center of the tag, and blending with the Pale Ochre, and then add in Mystic Violet, extending onto the bottom of the tag, and a little in the top portion. Ink the upper left and lower right with Watering Can. Repeat the process again to make the inks darker, and blending as you go, while really pushing the ink into the cracks. Once you are happy with the colors and blending, rub the pad portion of the Watering Can Archival, directly over the whole tag to highlight the texture even further. Ink over the tag hole with Watering Can as well. Use a Black Tie Paint Dabber to paint the edges of the tag and tag hole, purposely extending over the edges onto the tag, and then use your finger to smear the paint around the edges of the tag, to give it a framelike appearance. Let this dry, and then adhere the tag hole on with Multi Matte Medium.

Step 11: Adhere the moon on the tag in the upper right corner using foam tape. Shake the Pearl Mica Mist, and lightly mist over the tag for more starry night shimmer. Once dry, lay the Circles Stitching Template in the lower left of the tag, and using a Fude Ball Pen, trace in the outer dots of the template. Remove the template and then place dots of Black Tie Enamel Accents over the traced dotted pattern. This will act as a frame for the witch. Punch out about seven Mat Mini Stars, and mist them with Buttercup Mica Spray after you’ve shaken it. Let these dry.

Step 12: Cut a small piece (1.5×4 inch) of black tulle, and fold it back and forth over itself to create a pleated look, and stitch over it to hold the pleats in place. You can use Adhesive Strips if you don’t want to sew. Adhere this onto the top of the legs with Adhesive Strip, so it looks like a skirt. Take the broom, and cut off about two inches of the top part of the stick, so that you now have two parts. Turn the cup and saucer over to the back, and adhere the sweeping portion of the broom to the middle right side of the cup (the part with the handle) using Multi Matte Medium, and the handle part to the middle of the left side of the cup. This will make it look like the broom is much longer when you flip it over to the correct side. Let this dry. Once this is dry, adhere the witch part to the tag at an angle in the upper left part of the circle frame, using Multi Matte or Adhesive Strips. Add foam tape to the back of the cup and saucer on the bottom and sides, but don’t lay it on the tag yet. Add adhesive to the leg portion, and the back of the broom. Simultaneously, lay both the legs and cup/broom down on the tag, so that the witches bottom is covered up by the cup, and the legs are positioned correctly proportioned to the bodice, and it looks like she is sitting in the cup. Press it all down firmly, and add any adhesive to parts that need it.

Step 13: Take the Halloween Typography and spell out the words Witches Brew (You will need an extra ‘W’, so it will take two packs.). Ink over the top portion of a letter with Orange Blossom Archival (Any Archival will work.), and dip the letter into the Orange Blossom Embossing Powder jar. Using tweezers will make this much easier to do. Shake off any excess, and heat emboss the letters until the powder melts only. If you heat the letters too much they will melt, so be quick and exact. Repeat with all the letters, and then adhere them in place on the tag with adhesive (I used Glossy Accents.). Adhere the 31 onto the pumpkin on the cup, as well as the stars randomly over the tag. Tie more black tulle into the tag hole.

Related Posts

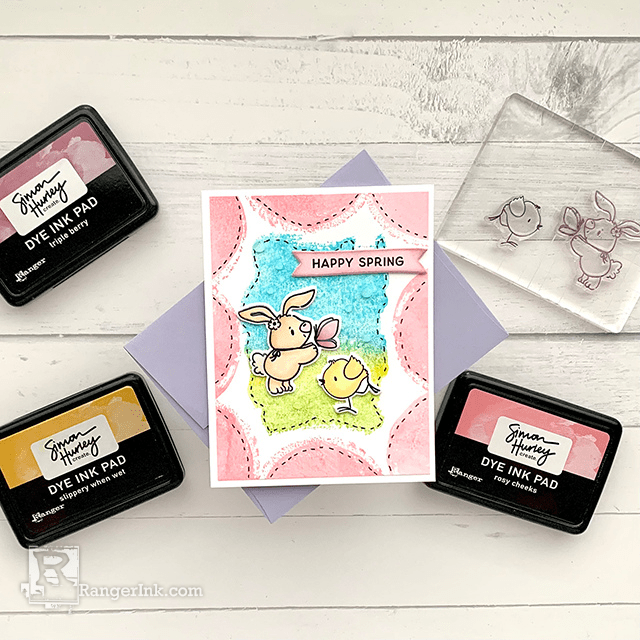
Simon Hurley create. Easter Card by Lieschen Harshbarger
Hop into spring with this adorable Easter card tutorial by Lieschen Harshbarger! Follow along as she uses the latest...
Read More