


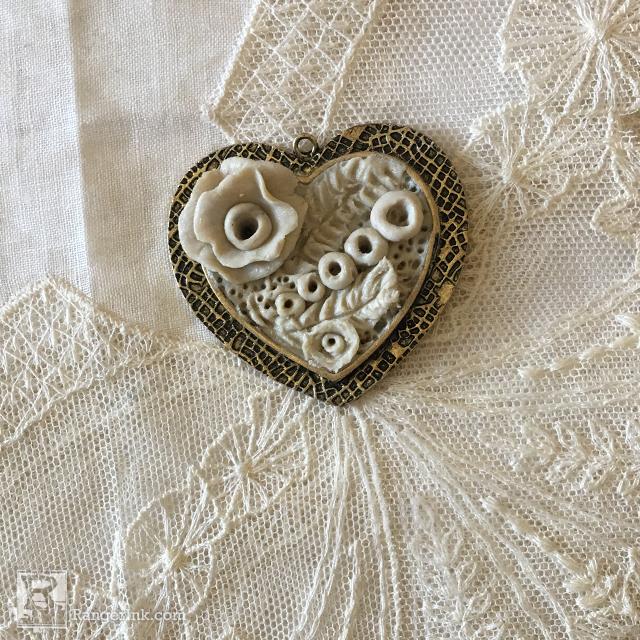
In this tutorial, Sharen AK Harris shares simple techniques for creating a QuickCure Clay heart pendant right inside an ICE Resin bezel. Reminiscent of vintage lace, this darling pendant can be left as is or colorized with a variety of ink and other colorants.
QuickCure Clay Lace Heart Pendant by Sharen AK Harris
- Materials
- Instructions
Instructions

Step 1: Working on the Non-Stick Craft Sheet apply a thin layer of clay over the inside of the ICE Resin Heart Milan Bezel.

Step 2: Roll a 1/8” coil.

Step 3: Add coils to the bezel cutting off the edges with a toothpick.


Step 4: Using a toothpick pull out the veins of the leaves. The center of the leaf is a little wider than the tip of the leaf.

Step 5 : Make a ball of QuickCure Clay about ¼” and smash it down with your fingers to make an uneven edged pancake. Apply it to the ICE Resin Bezel. This is the beginning of the flower.

Step 6: Make another slightly smaller ball and repeat the last step.

Step 7: Make a very small ball and apply it to the center of the flower. Using a toothpick, make a hole in the center of the ball of clay.

Step 8: Make a series of graduated QuickCure Clay balls.

Step 9: Apply the balls of clay to the bezel. Using a toothpick poke holes in the clay balls.

Step 10: Using a toothpick, poke holes in all the smooth background areas of the QuickCure Clay for interest. You can add a ball at the bottom of the heart and put a large hole in it and a small tiny ball in the center to make another flower. You can add as many flowers as you like. This is just a sample of techniques you can use. Don’t be afraid to come up with your own design.

Step 11: To cure the pendant, use a Ranger Heat It Craft Tool and rotate the heat tool over the piece. Hold the heat tool to one side and it will use frontal polymerization to cure the clay. The heat with move in a line across the pendant to cure the clay. Test the piece with a toothpick to see if it totally cured. It only takes a couple of minutes.

Step 12: The pendant can be left as is for a natural look or colorized with a variety of inks and other colorants.
 Born an artist in Lynn, MA, Sharen AK Harris is a self-taught artist for the most part but was influenced by outstanding art instructors throughout her life. Sharen received her certification with the National Society of Decorative Painters. Studies included classes in Portugal and France in 2007. Sharen is proficient in several mediums and uses each skillfully to achieve the poetic romanticism which she is known for. “I paint when I sculpt and I sculpt when I paint. I get such joy sculpting and painting and coming up with new ideas, but everything is related to my life and the world around me. The only thing I love more than doing art and loving my family and friends is teaching art. I want everyone to experience the joy of doing successful art work.”
Sharen teaches workshops and demonstrates for Ranger Ink teaching new artists the magic of Alcohol Ink. Sharen has a studio in Arizona where she paints and sculpts great works of art.
Follow Sharen on Facebook at Sharen AK Harris Fine Art or visit her website www.sharenakharris.com
