


Perfect Pearls Journal Page by Lauren Bergold
- Materials
- Instructions
Perfect Pearls™ Pigment Kit Jewels
Perfect Pearls™ Pigment Powder Perfect Gold
Perfect Medium™ Pad
Wendy Vecchi Archival Ink™ Pad Thistle
Archival Ink™ Pad Pebble Beach
Dina Wakley Media Stamp Everyone is Welcome
Dina Wakley Media Journal Blue Edition
Simon Hurley create. Stencil 6x6 Sweater Weather
Simon Hurley create. Stencil 6x6 Grand Greenery
Letter It™ Grey A2 Cardstock
Letter It™ White Cardstock
Tim Holtz Distress® Kraft Heavystock
Wendy Vecchi MAKE ART Perfect Card Adhesive
Ranger Misters
Ranger Mini Ink Blending Tool
Ranger Mini Ink Blending Tool Domed Replacement Foams
Letter It™ White Foam Roll Tape
Instructions
My art journal is my favorite place to experiment with new (to me) products and techniques. Since there are so many ways to use Perfect Pearls, and they look different on every shade of paper, I think I could fill an entire volume!

Step 1: Gather supplies: Perfect Pearls Jewels Pigment Kit and Perfect Gold; Archival Inks in Thistle and Pebble Beach; Letter It A2 Cardstock in Grey and White; Dina Wakley MEdia stamp set, Everyone is Welcome; Simon Hurley create. stencils, Sweater Weather and Grand Greenery; Dina Wakley Blue Edition Journal.
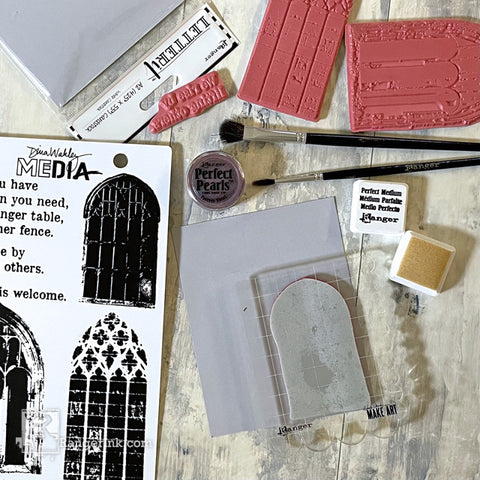
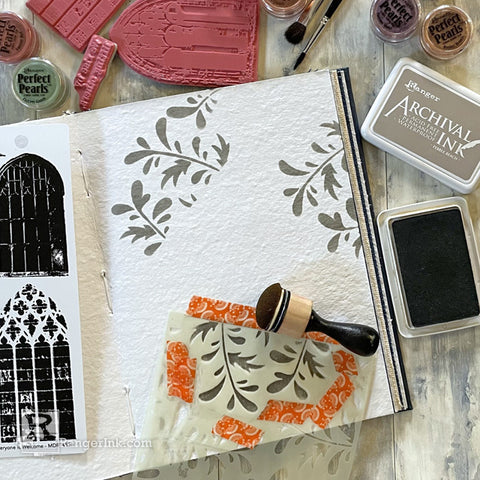
Step 2: Apply Perfect Medium to the smallest window stamp from Dina Wakley's Everyone is Welcome set in the same way that you would apply ink, making sure to cover the entire image thoroughly. Stamp firmly onto a panel of grey Letter It Cardstock, leaving some extra room around the image.
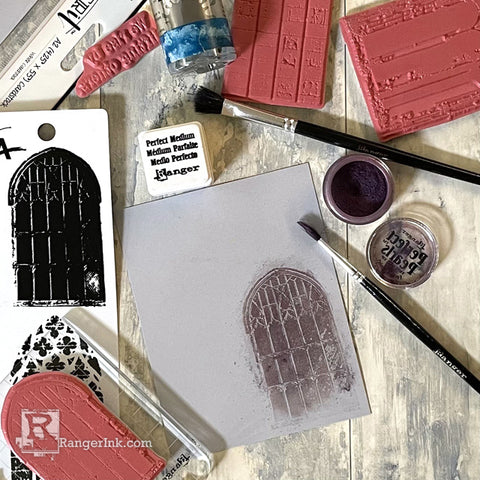
Step 3: Use a detail brush to apply Violet Perfect Pearls powder to the image, then remove any excess or stray powder with a dusting brush. (Note: Perfect Pearls Kits include both styles of brushes and a small Perfect Medium pad as well as four curated colors of Perfect Pearls; other shades and a larger pad are available separately).
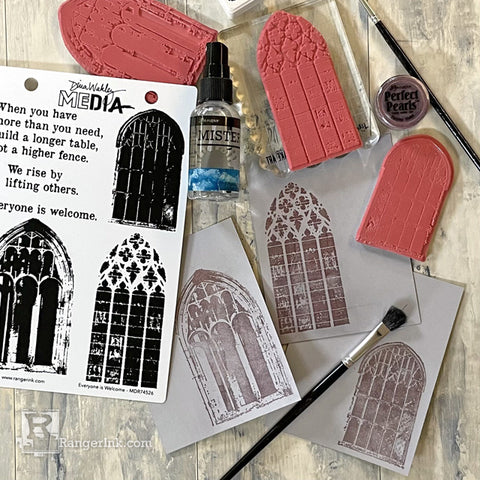
Step 4: Stamp the other two windows in the same manner and dust them with Perfect Pearls. When finished, use a Ranger Mister to lightly mist the images with water to set them. Allow them to dry completely.
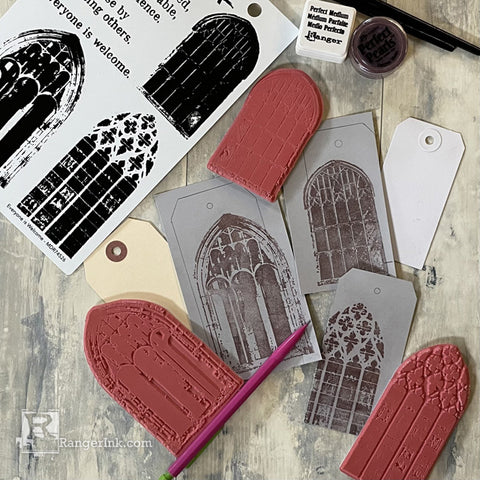
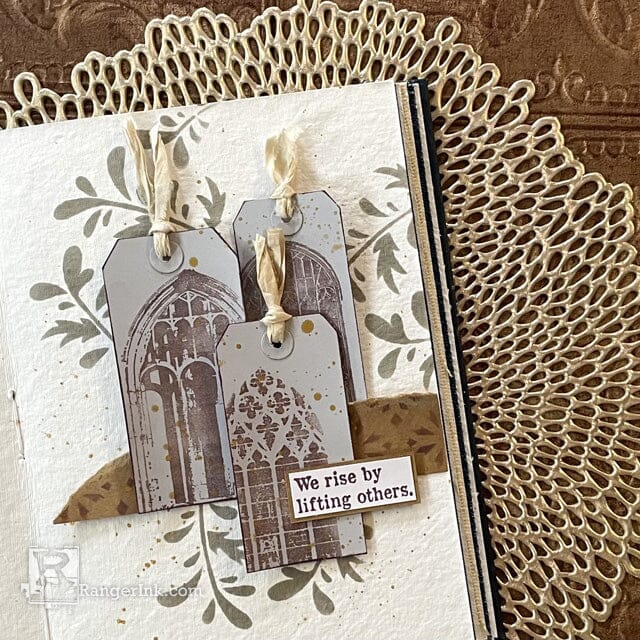
Step 5: With a pencil, trace lightly around several sizes of Letter It and Dina Wakley MEdia tags, positioning the templates so that the stamped images go off the left, right or bottom edge. Trim the images into the tag shapes. If desired, add small punched circles from the offcuts of the cardstock and punch holes through them.
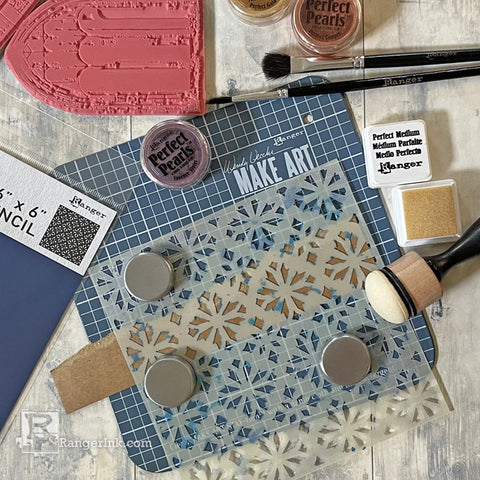
Step 6: Tear a piece of Tim Holtz Distress Kraft Heavystock to approximately 6 x 1" allowing it to slope downwards a bit on one side. Use a Ranger Mini Ink Blending Tool and a perfectly clean Domed Foam to apply Perfect Medium through the Simon Hurley create. Sweater Weather stencil.
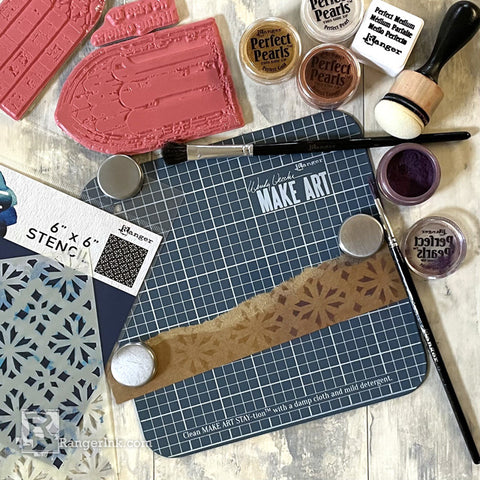
Step 7: Use a detail brush to apply Violet Perfect Pearls powder to the stenciled pattern, remove any excess powder with a dusting brush and lightly mist with water to set.
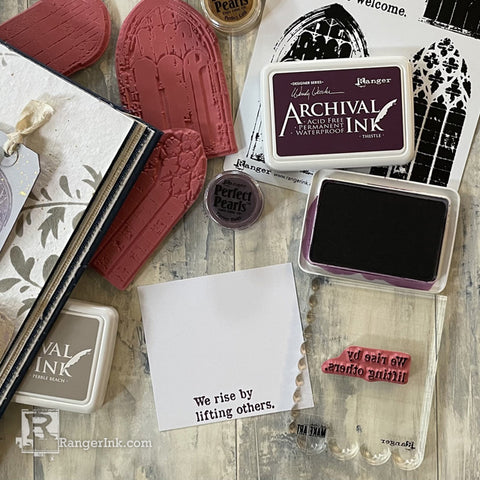
Step 8: Stamp "We rise by lifting others" in Thistle Archival Ink on a scrap of white Letter It cardstock. Trim into a small strip and mat on a scrap of kraft.
Step 9: Apply Pebble Beach Archival Ink through a small section of Simon Hurley's Grand Greenery stencil. Use washi tape to isolate the fronds you'd like to feature. Add three clusters of leaves in a loosely triangular arrangement: top left of page, middle of the righthand edge, bottom of page towards the center.
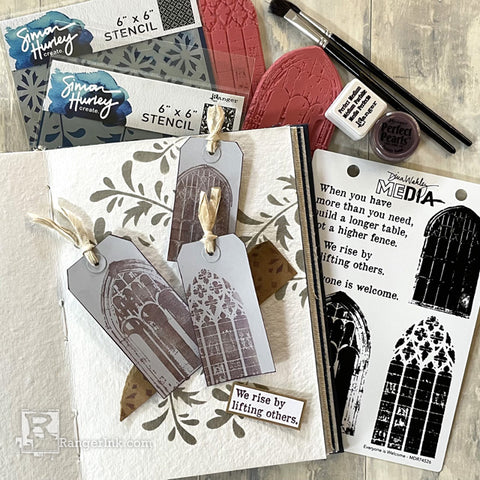
Step 10: Assemble (most of) the page: Edge the tags with Thistle Archival and add small pieces of ribbon through the holes. Add the stenciled strip of kraft horizontally, about three inches from the bottom of the page with Perfect Card Adhesive. Affix the tags to the center of the page, in a cluster, using Letter It White Foam Roll Tape. (Don't add the sentiment yet.)
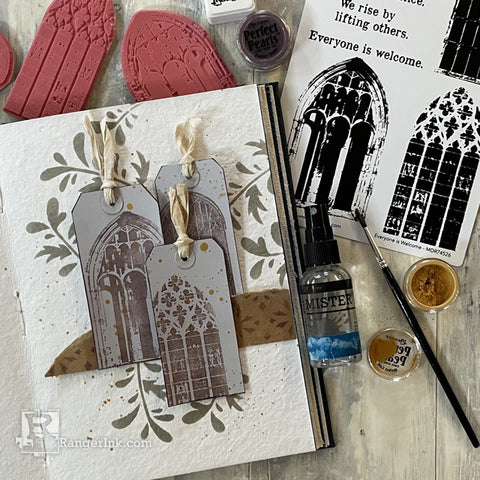
Step 11: Place a small amount of Perfect Gold powder in the lid of the Perfect Pearls container and add a few drops of water. Use the detail brush to pick up some of this liquid and tap gently to splatter it all over the page. Be sure to wipe the lid thoroughly dry before replacing on the Perfect Pearls!
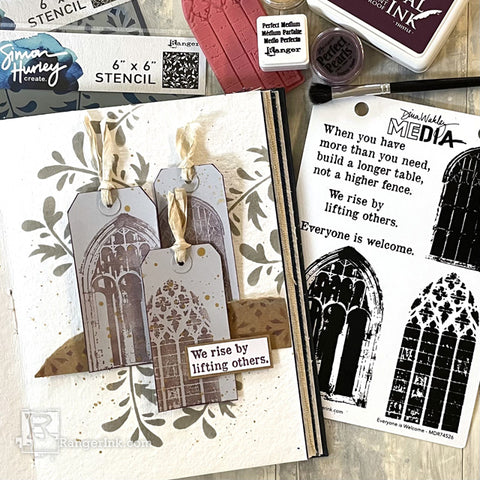
Step 12: Affix the sentiment to the right hand side of the page with small pieces of Letter It White Foam Roll Tape. Admire your finished page and start thinking about other ways to use Perfect Pearls including: light shades on dark cardstock; diluted and used like watercolors; mixed into clear Gesso or white texture paste; mixed with water in a Mini Mister and sprayed through a stencil... and lots more!
 My name is Lauren Bergold, and I live in central New Jersey with my husband of 30+ years and A LOT of art supplies! My favorite medium is paper, and I especially love making cards. I teach papercrafting classes, as well as collecting and compiling vintage and found papers. You can find me on my blog, All the Good Blog Names Were Taken, and on Instagram as @llaurenb where I love to connect with other artists and makers!
 Related Posts

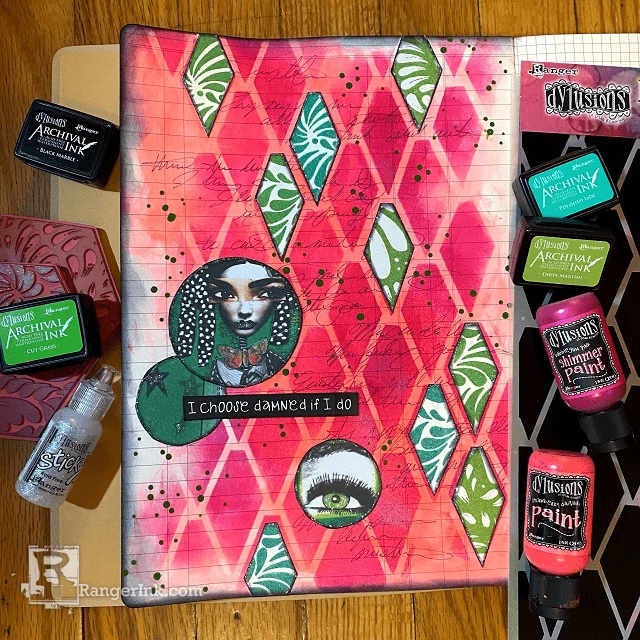
Dylusions Archival Ink Damned If I Do Journal Page by Jess Peters
Explore the latest Dylusions products in this journal page tutorial with Jess Peters! Crafted in the new Large Ledger...
Read More
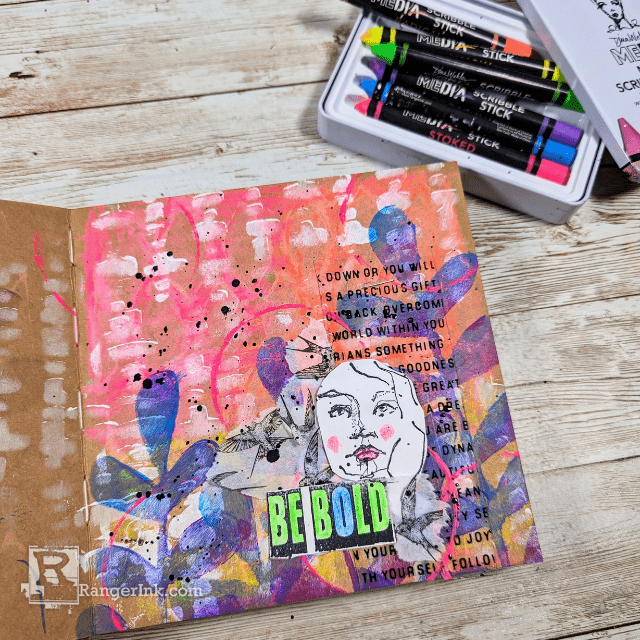
Unleash Creativity with Dina Wakley Neon Scribble Sticks by Laura Dame
Illuminate your journals with bursts of color and energy using the dynamic Dina Wakley MEdia Neon Scribble Sticks! Join Laura...
Read More