


by Bobbi Smith

Peace, Love and Joy Holiday Card by Bobbi Smith
- Materials
- Instructions
- ICED Enamels® Inclusions Shattered Mica: Opal
- ICED Enamels Relique Powders: Chartreuse
- Tim Holtz® Distress Glitter: Peacock Feathers
- Stickles™ Glitter Glue: Magenta
- Perfect Pearls™ Pigment Powders: Forever Blue
- Ranger Palette Knife Set
- Tim Holtz® Alcohol Ink Applicator
- Ranger Paper Creasers
- Tim Holtz Distress® Sprayer
- Ranger Heat it™ Craft Tool
- Ranger Ink Blending Tool & Foam
- Ranger Brayers
- Ranger Non-Stick Craft Sheet™
- Archival Ink™ #0 Pads: Vermillion, Olive
- Ranger Emboss It™ Pens
- Tim Holtz® Adirondack® Alcohol Inks: Mushroom
- Ranger Shiny Foil Transfer Sheets Vintage
- Ranger Glossy Accents™
- Ranger Sticky Embossing Powder
- Tim Holtz Distress® Glitter Dust
- Ranger Texture Paste Transparent Gloss
- Tim Holtz® Distress Spray Stains: Festive Berries
- Tim Holtz® Distress Ink Pads: Walnut Stain, Fired Brick
- Tim Holtz Distress® Watercolor Cardstock
- Tim Holtz idea-ology: Sanding Grip, Remnant Rub Tool, Gilded Holiday Rubs, Crinkle Ribbon
- Tim Holtz Core’dinations Kraft Core #4 & #24
- Tim Holtz Stampers Anonymous Snowflakes Layering Stencil THS050, Plaid and Nordic CMS243, Handwritten Holidays 3 CMS248 and Mesh and Linen CMS221 Stamp sets
- Tim Holtz Alterations by Sizzix Thinlits Holiday Greens 658759, Laurel Punch 660172 and Shield Punch 660161
Instructions
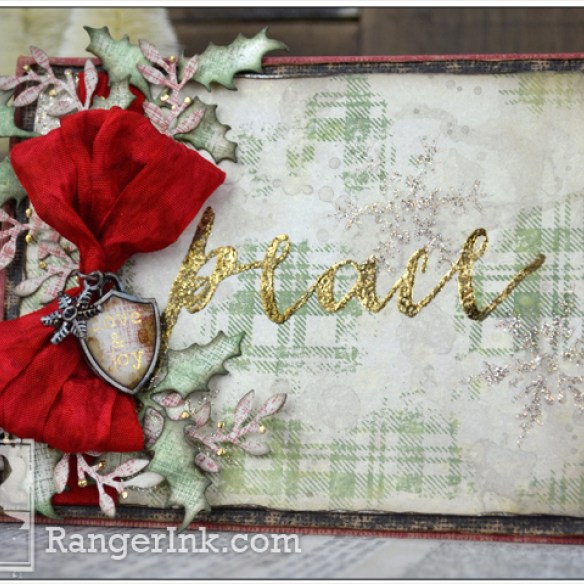
Hi everyone, Bobbi here! I’m excited to be with you on the Ranger Blog today! I’m going to show you how to create a sparkling, shimmery, foiled Holiday card! Today’s card features inclusions in Ranger Translucent Glossy Embossing Paste.

Step 1: Squeeze a couple drops of Antique Linen Distress Paint onto a Non-Stick Craft Sheet, and lightly mist the paint with water. Press the smooth side of the Distress Watercolor Cardstock into the paint mixture until covered. Dry with a Heat it Tool. To add more distress, pick up droplets of color off the Non-Stick Craft Sheet with Distress Watercolor Cardstock, blotting to pick up the color (not swiping), then drying with Heat Tool. Repeat these steps to two more pieces of Distress Watercolor Cardstock.

Step 2: Now we’re going to add another layer of color. Squeeze a couple drops of Pumice Stone Distress Paint onto a Non-Stick Craft Sheet, and lightly mist the paint with water. Press the smooth side of the Distress Watercolor Cardstock into the paint mixture until covered. Dry with a Heat it Tool. To add more distress, pick up droplets of color off the Non-Stick Craft Sheet with Distress Watercolor Cardstock, blotting to pick up the color (not swiping), then drying with Heat Tool. Repeat these steps to the two previous pieces of Distress Watercolor Cardstock.
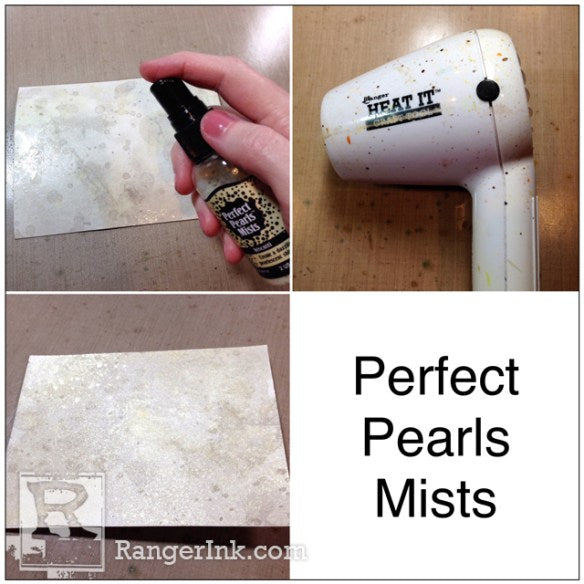
Step 3: Time for a little shimmer! Mist puddles of Biscotti Perfect Pearls Mist over Distress Watercolor Cardstock then dry with a Heat Tool. This gives a beautiful neutral shimmer over the Distress Paint. Repeat these steps to the two previous pieces of Distress Watercolor Cardstock.

Step 4: Lay the Plaid Stampers Anonymous stamp onto the Non-Stick Craft Sheet and apply ink using Olive Archival Ink and a brayer. Gently lay one of the colored Distress Watercolor Papers on top of the inked stamp and apply very little pressure sporadically over the surface of the stamp. Very carefully lift the Distress Watercolor Paper off of the stamp and dry Watercolor Cardstock with a Heat Tool. Not all of the stamped image will transfer to the Watercolor Cardstock and it gives it a lovely vintage distressed appearance. You can really see the great shimmer in the 4th picture.

Step 5: Repeat this process with the Linen Stampers Anonymous background stamp and the 2nd colored Distress Watercolor Cardstock. Lay the Linen Stampers Anonymous stamp onto the Non-Stick Craft Sheet and apply ink using Olive Archival Ink and a brayer. Gently lay one of the colored Distress Watercolor Papers on top of the inked stamp and apply very little pressure sporadically over the surface of the stamp. Very carefully lift the Distress Watercolor Paper off of the stamp and dry Watercolor Cardstock with a Heat Tool.

Step 6: Clean the linen background stamp very well and repeat the process with Vermillion Archival Ink and the third colored Distress Watercolor Cardstock. Lay the Linen Stampers Anonymous stamp onto your Non-Stick Craft Sheet and apply ink using Vermilion Archival Ink and a brayer. Gently lay one of the colored Distress Watercolor Paper on top of the inked stamp and apply very little pressure sporadically over the surface of the stamp. Very carefully lift the Distress Watercolor Paper off of the stamp and dry Watercolor Cardstock with a Heat Tool. Punch six Laurel leaves using the Tim Holtz Sizzix Laurel punch and the vermillion linen stamped cardstock. Shade the edges of leaves with a little Walnut Stain Distress Ink in a Blending Tool with Foam.

Step 7: Lay a scrap piece of paper over your Non-Stick Craft Sheet. Apply a little embossing ink using the Ranger Clear Embossing Pen to what appears to be berries on the 6 punched Laurel sprigs. Generously sprinkle Sticky Embossing Powder over laurel sprigs then shake off excess Sticky Powder. Put leftover Sticky Embossing Powder back in jar. Apply heat with Heat It tool to laurel sprigs to melt Sticky Embossing Powder.

Step 8: I really liked the two-tone effect, so I applied gold and chocolate Foil Sheets from the Vintage Collection to melted Sticky Embossing Powder. There is a shiny side and a dull side to the foil sheets. Always apply the foil dull side down to the adhesive.

Step 9: Stamp the word “peace” using Distress Embossing Ink off center to the left-hand side of the plaid background Watercolor Cardstock. Generously sprinkle Sticky Embossing Powder over stamp image. Shake off excess Sticky Embossing Powder and return to jar. Heat stamped image with Heat Tool to melt Sticky Embossing Powder.

Step 10: Apply gold and chocolate Foil Sheets from the Vintage Collection to melted Sticky Embossing Powder (dull side down).

Step 11: Now for some Transparent Texture Paste fun! I love to put inclusions in Transparent Texture Paste whether it’s gloss or matte, but today we’re using gloss. Scoop a small amount of Transparent Gloss Texture Paste onto the Non-Stick Craft Sheet using a palette knife. Add a very small amount of Distress Glitter Dust (about the size of a pea) to the top of the texture paste. Mix glitter and paste well with your palette knife. Lay Snowflake Layering Stencil over stamped Watercolor Cardstock. Apply a thin layer of Transparent Gloss Texture Paste/Glitter Dust mixture over single snowflake using a pallet knife. Lift stencil carefully and apply additional snowflakes sporadically throughout Watercolor Cardstock by repeating the process.

Step 12: For a little bit of extra sparkle I did sprinkle a tiny bit more of the Distress Glitter Dust onto snowflakes while they were still wet (a tiny bit goes a long way). While the paste is still wet, it is opaque white but after it dries completely it is 100% transparent and will take on the image of whatever is applied to. You can see that great plaid image through the snowflakes and my photos do not do justice to the brilliant sparkle that the Distress Glitter Dust creates!

Step 13: Die cut two sprigs of holly from the Olive linen stamped Watercolor Cardstock using Tim Holtz Festive Greens Holly Thinlits die. Shade leaf edges with Olive Archival Ink and a Blending Tool then a little Walnut Stain Distress Ink and a Blending Tool. Heat to dry if needed. Cut the two sprigs of holly in half to make for smaller pieces.

Step 14: Punch medium shield shape from leftover Vermillion linen Watercolor Cardstock sheet using Sizzix Tim Holtz Shield Punch (the image fits the shield charm perfectly). Apply Guilded Holiday “love & joy” Remnant Rub to punched shield using Remnant Rub Tool. Apply a little Walnut Stain Distress Ink to outer edges of punched shield Watercolor Cardstock using a Blending Tool. Adhere punched image to shield charm using a dab of Glossy Accents.

Step 15: Apply clear sticker over shield image. Smear a little Iced Spruce Distressed Paint on snowflake charm and shield charm with finger to add a little distress. Then dry with a heat tool, being careful not to melt sticker on top of shield charm. Apply a dab of Mushroom Alcohol Ink to snowflake, shield and O-ring to further distress using Alcohol Ink Applicator Tool and Felt. If needed dry with Heat Tool but Alcohol Ink dries very quickly.

Step 16: Cut about 2 yards of Crinkle Ribbon, then on your Non-Stick Craft Sheet spritz with water using Distress Sprayer. (I do usually wear plastic gloves when coloring my crinkle ribbon.) Spritz Festive Berries Distress Spray Stain onto Crinkle Ribbon. Scrunch the ribbon with your hands to distribute color as you dry with Heat Tool.

Step 17: Smear a little Fired Brick Distress Ink onto your Non-Stick Craft Sheet. Pick the color up off the mat using your crinkle ribbon then spritz a little water onto ribbon and dry with Heat Tool, scrunching the ribbon as you go to get a lovely crinkled, wrinkled affect when dry.
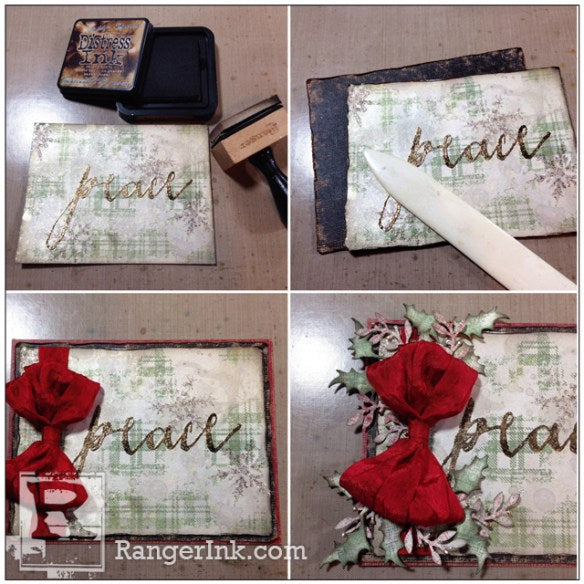
Step 18: Trim stamped Watercolor Cardstock 5 x 3 3/4. Shade edges of stamped Watercolor Cardstock with Walnut Stain Distress Ink and a Blending Tool. Cut the red #4 Kraft Core cardstock 8 1/2 x 5 1/2 then score and fold down the center. Cut the black #24 Kraft Core 5 1/4 x 4/ 1/8. Distress Kraft Core Cardstock with sanding grip to expose some of the kraft and wipe dust with a towel. Further distress edges of black Kraft Core and stamped Watercolor Cardstock with a bone folder. Tie off bow and attach to back of card front then layer up card. Attach holly and laurel around bow with adhesive.

Step 19: Attach snowflake and shield charm with O ring to center of bow.

Step 20: I wanted to share with you some other fun inclusions you could add to your transparent texture paste. My base was Glossy Transparent Texture Paste on white Distress Watercolor Cardstock. I used Glitter Glass, Perfect Pearls, Ice Resin Iced Enamels, Distress Glitter, Ice Resin Inclusions and Stickles! Just remember to start out with a small amount of inclusions (you can always add more if needed) normally around the size of a pea.


I hope you’ve enjoyed today’s techniques! I just love a bit of shimmer and sparkle for my holiday cards!

Related Posts

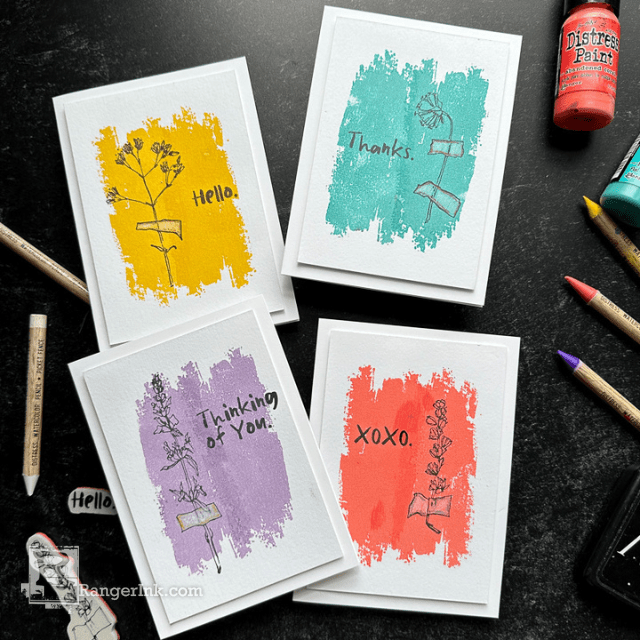
Distress Paint Floral Card Set by Cheiron Brandon
Join in on the fun with this tutorial by Cheiron Brandon! Using a delightful combination of Distress Paints, Watercolor Pencils,...
Read More
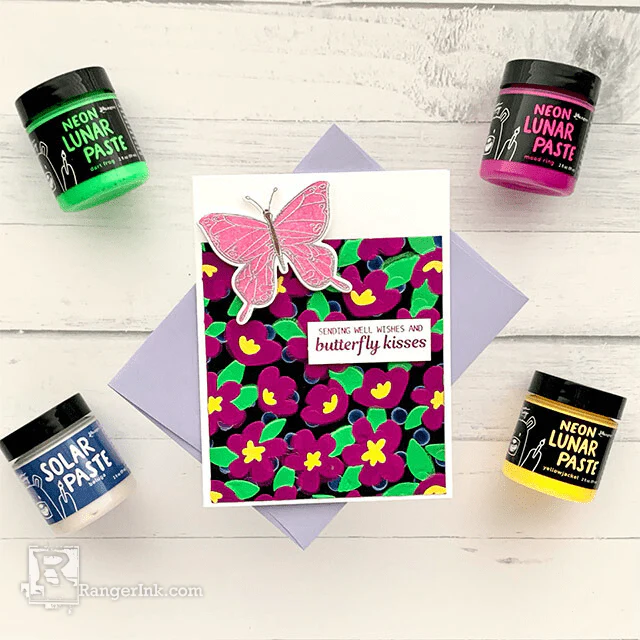
Simon Hurley create. Neon Lunar Paste Butterly Card by Lieschen Harshbarger
Follow along as Lieschen Harshbarger creates this stunning card filled with vibrant hues and fluttering beauty! Crafted using the...
Read More