


by Zoe Hillman

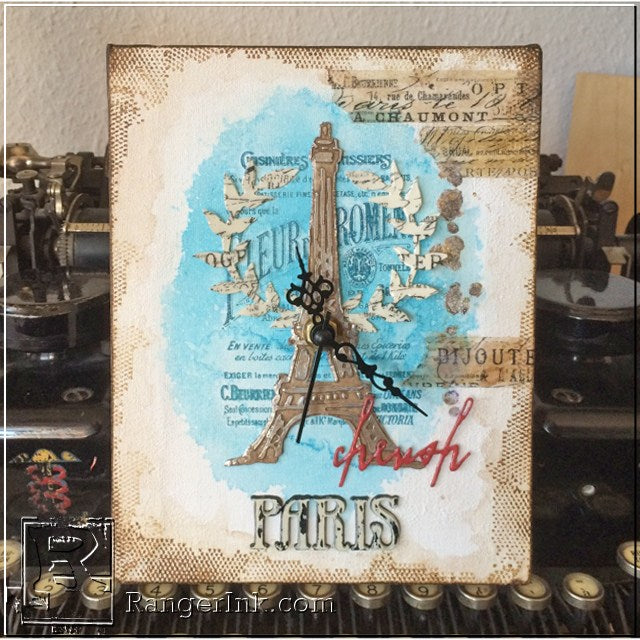
Mixed Media Canvas Clock by Zoe Hillman
- Materials
- Instructions
- Ranger Sticky-Back Canvas
- Vintaj® Arte Foil
- Tim Holtz Distress Ink Pads: Walnut Stain
- Tim Holtz Distress Spray Stains: Mermaid Lagoon
- Archival Ink Designer Series: Wendy Vecchi Cornflower Blue, Potting Soil
- Embossing Powders: Clear
- Ranger Emboss It™ Dabber
- Ranger Glossy Accents™
- Ranger Paper Creasers
- Ranger Mini Blending Tool
- Ranger Mister
- Ranger Artist Brush Set
- Ranger Non-Stick Craft Sheet™
- Ranger Heat it™ Craft Tool
- Tim Holtz Sizzix Alterations: 658556 - Fleur de Lis Bigz Die, 656637 - Regal Crest Bigz Die. 660218 - Handwritten Love Thinlits Die
- Tim Holtz Stampers Anonymous Layering Stencils: CMS060 - Slight Alterations Stamp Set, CMS071 - French Marketplace Stamp Set, 009 - Splatters Stencil
- Tim Holtz Idea-ology: Alphaparts, Tissue Tape - Sketchbook, Design Ruler, Tim Holtz Grid Blocks
- Misc.: Pencil, Hot Glue Gun, Wood Batton, Clock Mechanism, Drill, Saw
Instructions
 I have wanted to try my hand at making a canvas from scratch for some time, but there never seems enough time! I have been studying French and am still trying to find a good work / life balance. It seemed fitting to make a French themed clock canvas to remind me to make more time to make things!
 Build a frame for your canvas. The size of the frame is not critical, as long as you can stretch a piece of Ranger sticky-back canvas over it. I used a 1/2 inch by 3/4 inch wood baton cut into 4 pieces. The long pieces measure 8 inches, the short pieces measure 6 inches and all are angled at 45 degrees.
When you assemble the frame, a square object, (for example a stamp grid block), will help you to maintain the right angles. Use a glue gun to adhere the frame. *TIP: If there are any gaps in the joins of your frame, fill with extra glue. You will need sticky-back canvas, gesso and a brush or sponge for the next stage.
 Take a full sheet of sticky-back canvas and lay canvas side down. Place your assembled frame in the centre of the canvas and draw around the outside of the frame with a pencil. Using a ruler and a bone folder, score along these lines from edge to edge.
Fold the canvas along the score lines to mark, (this will allow you to see the lines once you remove the paper backing and also makes it easier to wrap the canvas around the frame). Trim the corners 1/2 inch from the fold, (as illustrated), to avoid bunching when you wrap it.
 Making sure your fold lines are clear, lay canvas side down and peel away the paper backing. Using the score lines as a guide, lay your assembled frame on top of the sticky-back canvas. Press firmly down and then tightly wrap each side up and over the frame. Turn the canvas over and make sure you have a nice flat tight surface.
Next cover the top and sides of the canvas with a generous layer of gesso and set aside to dry. I recommend 2 or 3 layers of gesso. *TIP: Use a resealable bag for your sponge to avoid drying out or having to clean between coats.
 Stamp your background design in the centre of the canvas using archival ink, (I used cornflour blue). You will need to put something underneath your canvas to lean on whilst stamping.
When the ink is completely dry, spritz the centre of the stamped image with distress spray, (I used mermaid lagoon), then spritz with water and tilt the canvas allowing the ink to wick and run until you’re happy with the look. Let the canvas dry and then flick or spritz a few more drops of water to give it a nice mottled look. The distress ink reacts with water and gives such beautiful results with such little effort.
Once the ink is completely dry, use a blending tool to ponce archival ink, (I used potting soil), through the Tim Holtz splatters stencil and leave to air dry.
 Stain the edges of your canvas by dragging a potting soil archival ink pad along them and allow to air dry.
 Ink up a stamp, (I used one from Tim Holtz’s slightly altered stamp set), with potting soil archival ink and randomly stamp around the edges of the canvas. You will not need to put anything underneath the canvas this time as the frame will provide a hard surface to stamp on.
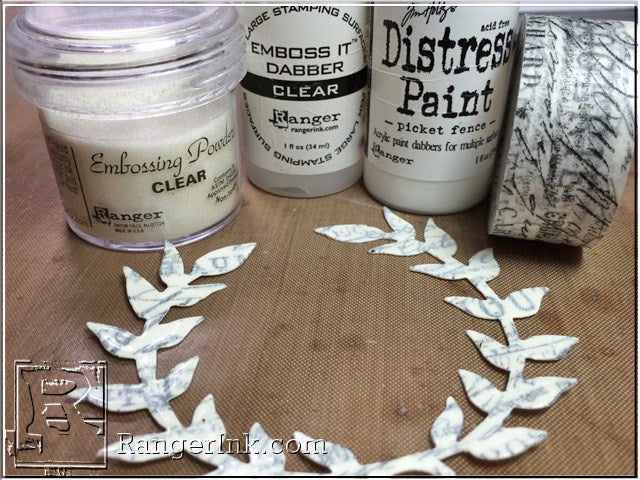 Create a background flourish by covering mixed media cardstock with tissue tape and then a layer of glue n seal. Once dry, die cut and cover with a very thin layer of picket fence distress paint. Cover the flourish with emboss it dabber ink, then with clear embossing powder and melt. Repeat the previous step to give a really nice enamelled look.
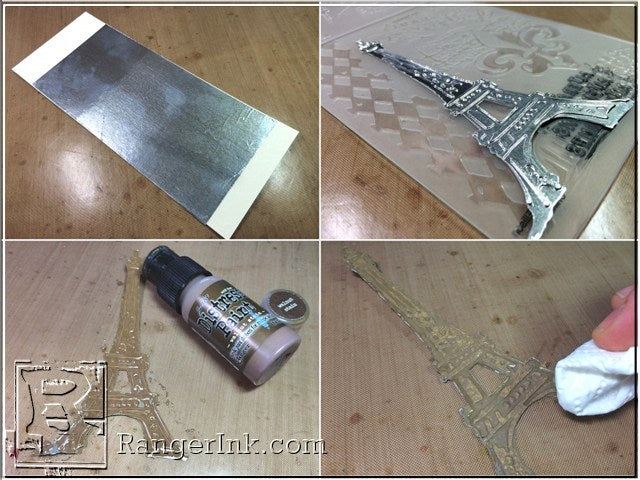 Cover mixed media cardstock with foil tape, die cut and emboss with a texture folder. Cover with walnut stain distress paint and allow to dry. Using a paper towel, gently rub over the raised sections of the die to remove the paint and reveal the metal foil underneath.
 Continue this process until you are satisfied with the look. *TIP: if you take too much paint off any section, just recover with distress paint and repeat the process.
 Die cut a feature word from mixed media cardstock. Cover in fired brick distress paint and allow to dry. Cover in emboss it dabber ink and clear embossing powder, and melt.
 Attach your feature word to the foot of the eiffel tower with a dab of glossy accents. I used this cherish word die from the Handwritten Love die set by Tim Holtz.
 Cover Tim Holtz ideology alpha parts with antique linen distress paint and set aside to air dry. Once completely dry, get a faux weathered look by gently rubbing with a paper towel or your finger to remove some of the distress paint.
 Cover tissue tape with glue and seal and wrap around the side and front of the canvas as desired. Once in place cover the tissue tape with another layer of glue and seal and allow to dry.
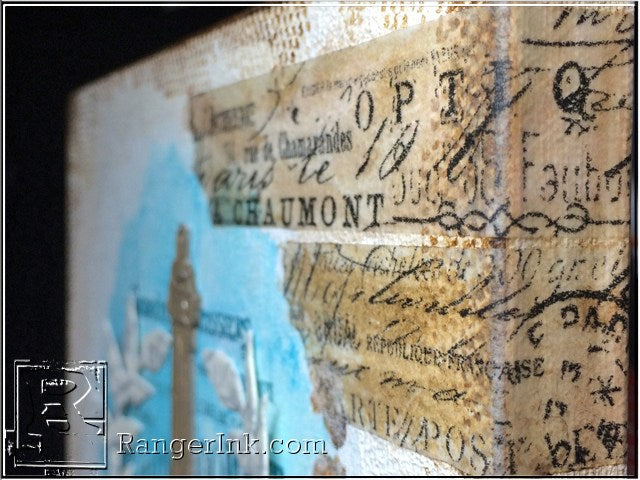 Rub walnut stain distress ink pad on to your craft sheet and spritz water over the top. Mix together into a wash and brush over the tape and edges of the canvas with a paint brush. Dab away any excess with a paper towel and allow to air dry.
 Decide the position of the clock face, mark and then drill a hole large enough to push the clock mechanism through the canvas.
 Push the clock mechanism through the canvas and secure with the nut provided. I didn’t glue the clock mechanism to the back so that it can be replaced in the future without damaging the canvas.
 Attach the clock hands, set the time, sit back and dream of Paris!