


by Audrey Pettit

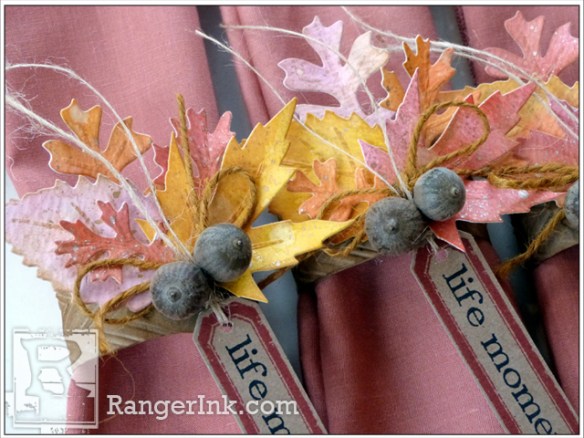
Life Moments Napkin Rings by Audrey Pettit
- Materials
- Instructions
- Tim Holtz® Distress Spray Stains: Antiqued Bronze, Tarnished Brass
- Tim Holtz® Distress Ink: Mustard Seed, Fossilized Amber, Wild Honey, Rusty Hinge, Spiced Marmalade, Ripe Persimmon, Fired Brick, Aged Mahogany, Barn Door, Victorian Velvet, Seedless Preserves, Wilted Violet, Brushed Corduroy
- Archival Ink™ Jet Black
- Ranger Wonder Tape™
- Ranger Mini Blending Tool
- Ranger Heat it™ Craft Tool
- Ranger Mister
- Ranger Non-Stick Craft Sheet™
- Ranger Watercolor Paper
Instructions
Create some special handmade accessories for your Thanksgiving table this year with these beautiful watercolor napkin rings.

Your guests will love the personalized touch. And you will love how quick they are to put together. Better yet, with the huge range of colors available in the Distress line, you can easily customize your project to match any décor or theme.
The Fall Foliage Thinlits dies I used are fabulous for a project like this because there are so many leaf shapes available in the set that I was able to create enough pieces to make 4-5 napkin rings with just four simple passes through my die cutting machine. That’s so awesome when you need quantities in bulk. Let’s get started.
 Step 1: To begin, cut a sheet of Ranger Watercolor Paper into four pieces. If you need to create more than 4-5 napkin rings, go ahead and cut more pieces of the paper.
 Step 2: Using a large watercolor paint brush, saturate the first piece of Watercolor Paper with water.
 Step 3: Select a range of Distress Ink colors to work with. For each piece of Watercolor Paper, I used three colors of Distress. For my first piece, I selected Mustard Seed, Fossilized Amber, and Wild Honey. Press the ink pads onto a Non-Stick Craft Sheet. Dip your paintbrush into water and then into the ink, and then apply the color randomly to the wet paper.
 Step 4: Apply all three colors of Distress onto the paper, letting them blend and meld together. Add more water with the paintbrush as needed. Set the paper aside to dry.
 Step 5: Wipe off your Craft Sheet, and then repeat the process on your second piece of Watercolor Paper with three different Distress colors. I used Rusty Hinge, Spiced Marmalade, and Ripe Persimmon. Set the paper aside to dry.
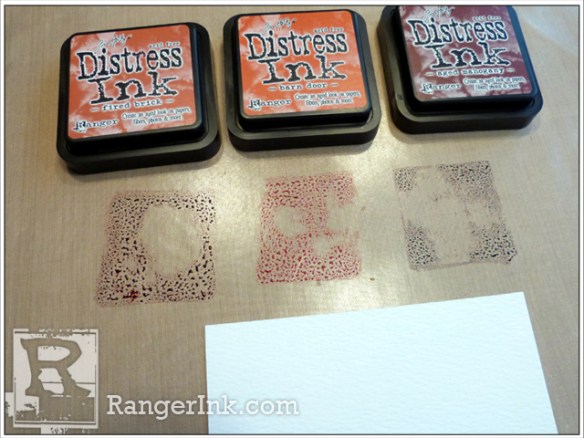 Step 6: Follow the same steps to color the third piece of watercolor paper with three new Distress colors. I used a red scheme for my third paper using Fired Brick, Aged Mahogany, and Barn Door Distress Inks.
 Step 7: Repeat the process again with three new ink colors. I used purples this time with Victorian Velvet, Seedless Preserves, and Wilted Violet. If you need more leaf die cuts, continue these steps until you have enough paper for your needs.
 Step 8: Allow all of the water-colored paper to dry completely, or speed up the process with a Heat Tool. Once dry, add some speckles to the paper using Distress Spray Stain. I wanted a metallic shine to mine, so I used both Antiqued Bronze and Tarnished Brass Distress Spray Stains. Allow the papers to dry completely.
 Step 9: Spritz the papers with the Mister to get water droplets. Allow the water to dry completely.
 Step 10: Die cut the papers with the Fall Foliage Thinlits dies. You can see how many leaves you can cut in one pass. Repeat the process with all the pieces of paper.
 Step 11: Ink the leaves with Brushed Corduroy Distress Ink using an Ink Blending Tool with Foam.
 Step 12: Continue inking all the leaves. Lightly bend the leaves along the center lines for a realistic touch.
 Step 13: Cut 1.25” x 8.5” strips of Ranger Kraft Cardstock for the rings.
Step 14: Emboss the strips with the ZigZag Texture Fade embossing folder. The strips are longer than the folder. Just let the ends hang out of the folder. I embossed all my strips in one pass.
 Step 15: Wrap the Kraft strips into a ring. At this step you’ll need to decide how wide you need your rings to be. For thicker napkins, make the rings wider. For thinner or paper napkins, make the rings smaller. Once you decide on your width, secure the end with a Tiny Attacher staple.
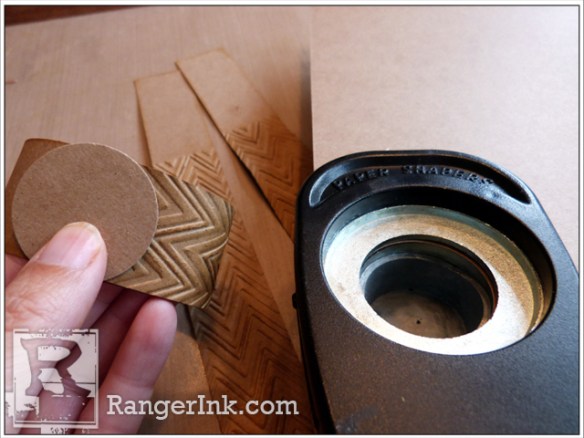 Step 16: Punch or die cut a circle from the Kraft Cardstock. It doesn’t really matter what size the circle is, so just use whatever you have on hand. I used a 1 3/8” circle punch. Apply Ranger Wonder Tape to the back of the circle and adhere the circle to the napkin ring base right over the staple.
 Step 17: Now arrange and adhere the leaves to the circle using Ranger Multi Medium Matte.
 Step 18: Tie a bow from Idea-ology Jute String and adhere to the stem of the leaves using a hot glue gun.
 Step 19: Adhere a pair of acorns below the bow using the hot glue gun.
 Step 20: Stamp the label and sentiment from the Leaf Blueprints Framelits die set onto Kraft cardstock. I used Fired Brick Distress Ink for the label and Jet Black Archival Ink for the sentiment. Die cut the labels using the matching die. Punch a hole in the end using a 1/8” punch. Thread with natural twine and then secure the label to the napkin rings.

I hope you enjoy!

