


by Cheiron Brandon

Frida Art Journal Spread by Cheiron Brandon
- Materials
- Instructions
- Dina Wakley Media Journal
- Fude Ball Pen : Black
- Dina Wakley Media Heavy Body Acrylic Paints : Turquoise, White, Evergreen, Lime, Lemon, Cheddar, Fuchsia, Gold, Elephant, Tangerine, Magenta, Ocean
- Dina Wakley Media Scribble Sticks
- Dina Wakley Media Stamps : Homage to Frida, Sketched Fronds, Boxed Faces, Scribbly Flowers and Insects
- Dina Wakley Media Brushes
- Dina Wakley Media Stencils & Masks : Spaced Dots
- Ranger Mini Blending Tool with Foam
- Ranger Non-Stick Craft Sheet™
- Tim Holtz® Distress Splatter Brush
- Archival Ink™ #0 Pads : Jet Black
- Tim Holtz® Distress Collage Medium
Instructions

I love the Homage to Frida stamps from Dina Wakley, and I could not wait to play with these stamps in the new Mixed Media Journal. The substrates in this journal are amazing, there are four different surfaces to play on. For this post, I am working on the cotton rag watercolor paper pages and the canvas page to create a cutout window. Follow along below to see all the steps I took to create this page.

Step 1: To create the focal image, stamp the Frida stamp with Jet Black Archival Ink, and use a black Fude Ball pen to “extend” the lines of the stamp image to make the image look a bit longer. Then color around the image with a wash of watered down Dina Wakley Media Heavy Body Turquoise paint.

Step 2: Color the face and hair of the image in with Scribble Sticks, and use the detail brush from the short handled Dina Wakley Media Brushes with some water to blend the color.

Step 3: To create the textured look on Frida’s dress, apply paint in White, Gilt and Elephant. Use the Dina Wakley Media Tool to create texture in the paint.

Step 4: Now it’s time to create the garden! Stamp the Sketched Fronds in various colors (Lime, Evergreen, Lemon, Cheddar) using both the solid and outline frond stamps. To apply paint to my stamps, I used an Ink Blending Tool with Foam and picked up the paint that I had applied onto my Non-Stick Craft Sheet. (Be sure to wash the paint off your stamps as soon as you are done).

Step 5: Once the garden is complete, add some splatter by watering down Ocean, Cheddar and White paint, flicking each color on the page using a Tim Holtz Distress Splatter Brush. (You may want to cover up your focal image with a mask so you don’t get any unwanted splatter on it).

Step 6: To create the canvas window, cut a heart in the page so Frida’s face will show through. Then add a piece of deli paper between the pages to protect the completed garden page. Brush on paints in Magenta, Fuchsia, Ruby, White and Mandarin using the largest paintbrush from the Dina Wakley Media Brushes until you achieve a blended look. Let it dry and do the same on the opposite side of the canvas page.

Step 7: To give the window added texture press the Spaced Dots stencil into the paint remaining on your palette then press it onto the canvas for a monoprint effect. Let it dry and do the same on the opposite side of the canvas page.

Step 8: Once the paint is dry, ink the inside of the heart with Black Archival Ink using an Ink Blending Tool with Foam to make the image inside the heart pop even more.

Step 9: I did not want to leave a blank two page spread, so I completed the left side page very similar to my first garden page by adding a wash of Turquoise paint, stamping a garden and creating splatter.

Step 10: Once this page is dry, add a few butterflies from the Scribbly Flowers and Insects set. Color them with Scribble Sticks, then cut them out and adhere them with Collage Medium to complete the two-page spread.

Here’s a shot of the completed page.

And another shot of the backside of the cutout page.

I hope you will try to create a garden scene or cut out page for yourself!

Related Posts

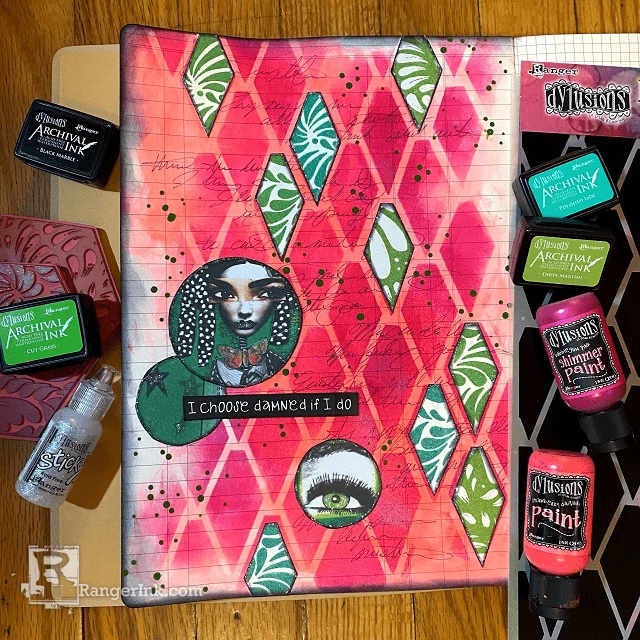
Dylusions Archival Ink Damned If I Do Journal Page by Jess Peters
Explore the latest Dylusions products in this journal page tutorial with Jess Peters! Crafted in the new Large Ledger...
Read More
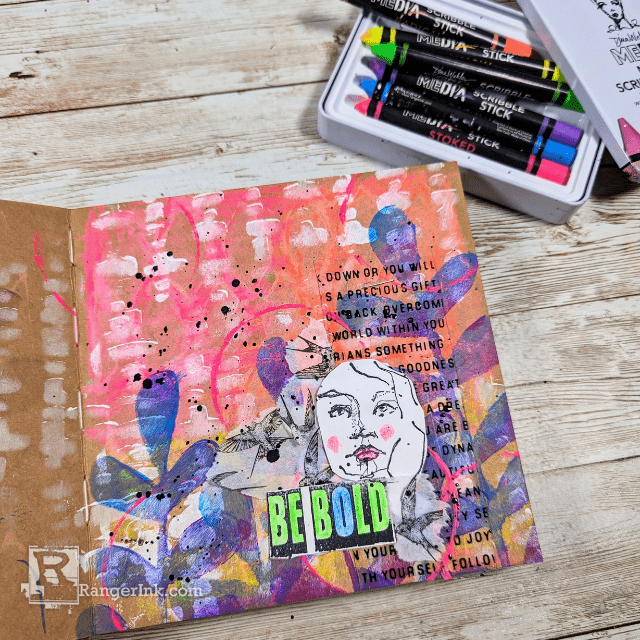
Unleash Creativity with Dina Wakley Neon Scribble Sticks by Laura Dame
Illuminate your journals with bursts of color and energy using the dynamic Dina Wakley MEdia Neon Scribble Sticks! Join Laura...
Read More