


Wendy Vecchi has just come out with new colors of Embossing Powders to match her Archival Inks, many of which are in the cute little minis, perfect for traveling. She also has binders and journal covers for use in organizing her stamp sets. For this project, I used her Journal Cover, Mat Minis, Archival Inks, and Embossing Powders to make an Autumn scene, that will house several of her stamp sets. There is nothing better than organized art materials that are also pieces of Art themselves. It’s functional organized Art!
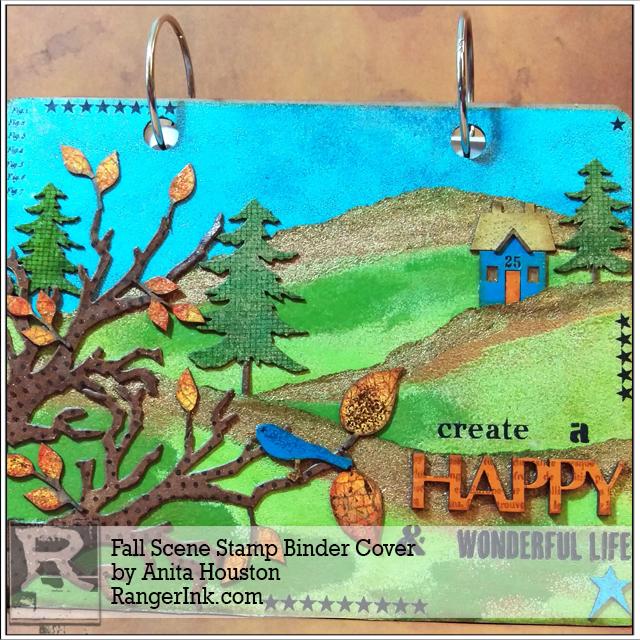
Fall Scene Stamp Binder Cover by Anita Houston
- Materials
- Instructions
- Ranger Surfaces Kraft Cardstock
- Embossing Powders : Enchanted Gold, Frosted Crystal
- Wendy Vecchi Embossing Powder : Potting Soil, Tree Branch, Orange Blossom, Red Geranium, Buttercup, Leaf Green, Fern Green, Forget-Me-Not, Cornflower Blue, Sky Blue, Watering Can
- Ranger Mini Blending Tool with Foam
- Archival Ink™ Designer Series: Wendy Vecchi : Leaf Green, Forget-Me-Not, Cornflower Blue, Potting Soil, Orange Blossom, Sunflower, Tree Branch
- Ranger Fillable Jars
- Archival Ink™ #0 Pads : Jet Black
- Ranger Adhesive Strips
- Ranger Multi-Medium : Matte
- Ranger Glossy Accents™
- Ranger Shiny Foil Transfer Sheets : Vintage
- Ranger Non-Stick Craft Sheet™
- Ranger Heat it™ Craft Tool
- Studio 490 Art Wendy Vecchi Art Parts: Journal Cover, Words For Art
- Studio 490 Art Wendy Vecchi Mat Minis: The Homestead, Birds and Their Houses, Flowers and Leaves, Flowers, Tiny Stars
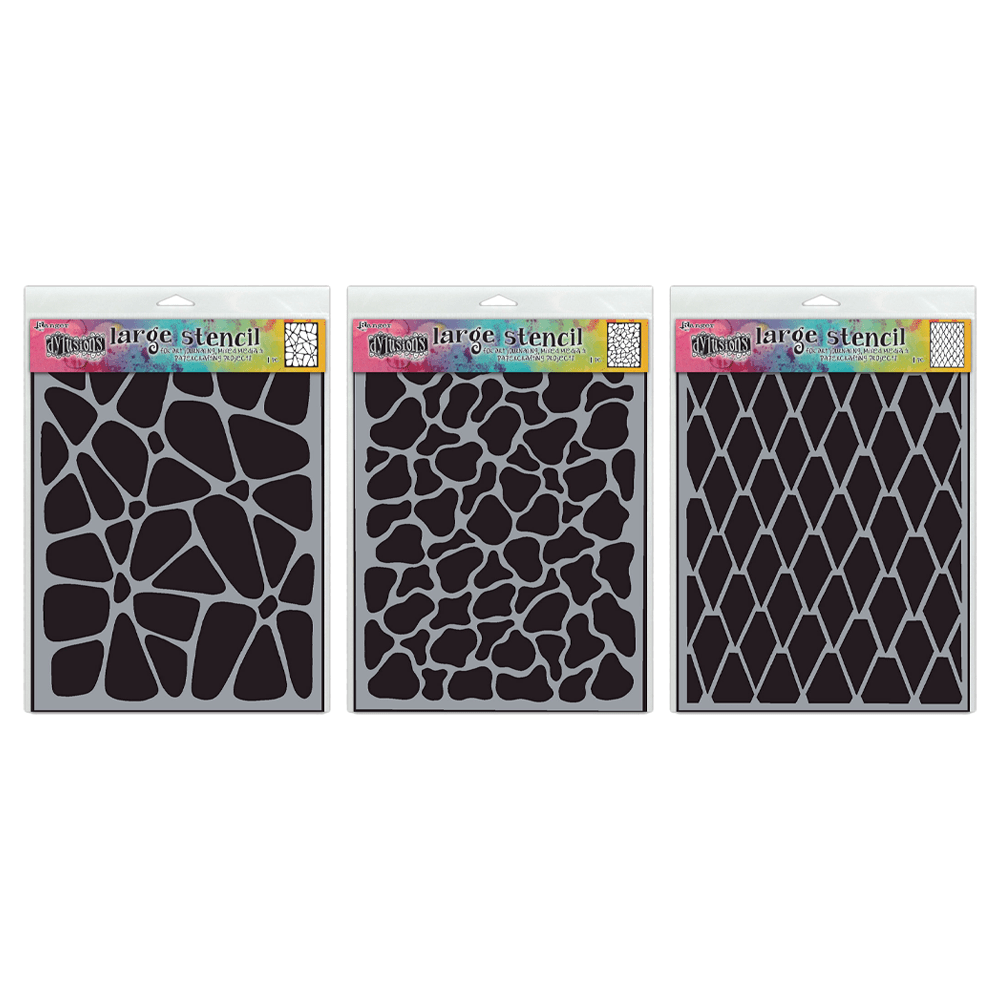
- Studio 490 Art Wendy Vecchi Background Stamps: Screen, Polka Dot, Les Roses, All Cracked Up
- Tim Holtz Alterations by Sizzix Bigz Die: Branch Tree
- Studio 490 Art Wendy Vecchi Stencils For Art: Select A Stencil LC
- Tim Holtz Idea-ology Remnant Rubs: Botanical
- Tim Holtz Idea-ology Remnant Rub Tool
- Thin Chipboard
- Scissors
- Die Cut Machine
- Tweezers
Instructions

Step 1: Mix equal parts of Enchanted Gold, Tree Branch, Orange Blossom, Red Geranium, and Buttercup Embossing Powders into a clean Fillable Jar. Cap the jar and shake the powders to mix them up. You’ve now created a blend that I’ll call Autumn Tones.

Step 2: Take a piece of the 8.5×11 Kraft paper, and cut off about four inches of it (width wise), and set this aside for the Branch Tree Die. Using the rest of the paper, tear it into three pieces (width wise), creating uneven portions (think hills and valleys), and making sure you have raw edges. These will be the hills. Ink the raw edges only with Leaf Green Archival either with an Ink Tool or just flat from the pad directly. Place it on a scrap piece of paper, and pour the Autumn Tones Embossing Powder onto the wet ink. Shake off the excess and put it back into the jar. Repeat with the other two pieces of hills, and then heat emboss them with a heat tool.

Step 3: Ink over the remaining portion of one of the hills with Leaf Green Archival, and place it on a scrap piece of paper again, and pour a little bit of Leaf Green and Fern Green Embossing Powders on it to get a variegated look to the hill. You can even use a little of the Autumn Tones powder here and there too. Use a new Fillable Jar for the remaining green powders, as you now have a blend to use in a new project. Repeat with the other two hills, and then heat emboss all three hills. When cool, ink the edges with Potting Soil Archival and an Ink Blending Tool. Lay the hills over the Journal Cover on the bottom portion to get a feel for what they will look like in the scene, and how much sky will show.

Step 4: Remove the hills and set them aside. Ink over the top of the Journal Cover where you want the sky portion to be with Forget-Me-Not Archival, going directly from the pad. Lay this on the scrap paper, and pour Forget-Me-Not, Cornflower Blue, Sky Blue, and Frosted Crystal Embossing Powders over it. Lift it up and shake off the powders, and pour them into a new Fillable Jar as you now have another blend. Heat emboss the sky area. When cool, use Adhesive Strips to add the hills to the Journal Cover, and trim the overhang off with scissors. Ink the edges of the cover with Potting Soil. Then scene is now coming to life.

Step 5: Take the piece of scrap Kraft paper that was set aside and adhere it to a piece of thin chipboard using either Adhesive Strips or Matte Multi Medium. When dry, die cut two of the Branch Trees out of it. Lay them over the bottom left of the journal sideways and layered on each other to mimic part of tree closest in the scene. Take pieces from The Homestead, Birds and Their Houses, Flowers and Leaves, and Flowers Mat Minis to form the rest of the scene, and place them over the journal so you can get a sense of how it will look. I used a large tree, two small trees, one house with door, roof, and eave, one bird, two large leaves, three of the larger trio of leaves, and two of the smaller trio of leaves.

Step 6: Ink and heat emboss the house with Cornflower Blue ink and powder, the door with Orange Blossom, and the roof and eave with Tea Branch, using the scrap paper and heat tool. Using tweezers or a hemostat helps with the smaller pieces so they don’t blow away. Use a piece of the kraft scrap as a base for the house to make attaching the pieces easier, and use Multi Matte for adhering everything. Ink the edges of the house with Potting Soil Archival, and then fill the windows with Glossy Accents for more detail. Ink and emboss the bird as well with Cornflower, Orange Blossom on the beak, and Tree Branch for the feet. Ink the edges of him with Cornflower Blue Archival.

Step 7: Use the green mixture of powders from before and ink over the trees with Leaf Green and heat emboss with the powders. Ink the trunks with Potting Soil after. Then ink over the Screen Background Stamp with Potting Soil, and lay the trees over the stamp and press to get the image of the screen. Lightly dry with a heat tool to set the ink over the embossed trees. Ink the edges with Potting Soil as well. Adhere the house and trees to the journal scene with Multi Matte Medium.

Step 8: Take the ‘Happy’ word from the Words For Art Parts set. Place in the center of the lower right hand corner of the journal. Cut the words ‘create’ and ‘wonderful life’ from the Tim Holtz Idea-ology Botanical Remnant Rubs, and place them as shown so you know how the sentiment will line up. Use a scrap piece of paper, and take the Select a Stencil Lower Case, and ink in an ‘a’ and the ‘ampersand’ using Jet Black Archival. The Select a Stencil is nice for quick and easy sentiments and spins around for fast letter selection, and the window opening makes sure you don’t get ink where you don’t want it. Lightly dry the stenciled letters with the heat tool to set. Cut the letters out and place them in the sentiment so you know where everything needs to go and how it fits together. Use the Remnant Rub Tool to adhere the rub ons. Rub on a number above the door on the house. I used a ’25’.

Step 9: Cleaning stencils and stamps is much easier now with Ranger’s new Archival Ink Cleaner. It has a bingo type dabber, and I squeezed out a bit on a rag, and cleaned over the stencil. Easy!

Step 10: Ink over the ‘Happy’ with Orange Blossom Archival, and then heat emboss with Orange Blossom Embossing Powder. Once cooled, ink over the Les Roses Background stamp with Potting Soil, and press the word over the stamp. Lightly dry with the heat tool to set. Adhere the ‘Happy’ in place with Matte Multi Medium.

Step 11: Ink over one of the Branch Trees with Potting Soil directly from the pad, and then using a scrap paper again, pour Tree Branch, Potting Soil, and Watering Can Embossing Powders over the tree. Shake off the excess and pour the mixture into another Fillable Jar. You now have four blends to use on other projects. Repeat with the other tree, and then heat emboss them. Using the chipboard with the embossing creates a leather like look to the trees. Ink over the Polka Dot Background Stamp with Jet Black Archival and press the trees over the stamp. Lightly dry with the heat tool. Adhere the trees to the lower left of the journal, layering them to fit nicely in the scene, with Matte Multi Medium. Trim off any overhang.

Step 12: Use more Remnant Rubs around the border of the cover. I used groups of stars and the ‘fig. 1’ image. Make sure all the edges are inked with Potting Soil since you’ve added the Branch Trees.

Step 13: Cut a few of leaves off of the trio of leaves, so have some more solo leaves. Ink over the stems with Potting Soil Archival, and lightly dry them. It’s okay if you get brown ink on the leaf portion as it will be covered up with embossing. Ink over the leaves with Sunflower Archival, and then pour Orange Blossom, Red Geranium, and Buttercup Embossing Powders over the leaves. Pour that mixture into your Autumn Tones jar. If you have powder on the stem portions, use a detailed paintbrush to clear it away. Do all the leaves and then heat emboss.

Step 14: Ink over the All Cracked Up Background Stamp with Potting Soil Archival, and press the leaves over the stamp, even the stem portions. They look very realistic. Get a piece of the Gold Vintage Foil Sheets ready. Heat the leaves lightly to set the ink, and then lightly press the foil over the leaf to add some Autumn glitz to them. Adhere the leaves to the Branch Tree with Multi Medium, and add the bird to one of the branches as well.

Step 15: For a little more interest, add in a Tiny Star, inked with Forget-Me-Not, and embossed with the blue mixture already made. Adhere it to the lower right corner with Matte Multi Medium.

