


By Anita Houston

Dylusions Trinity Resist Halloween Tag
- Materials
- Instructions
- Archival Ink™ #0 Pads: Jet Black
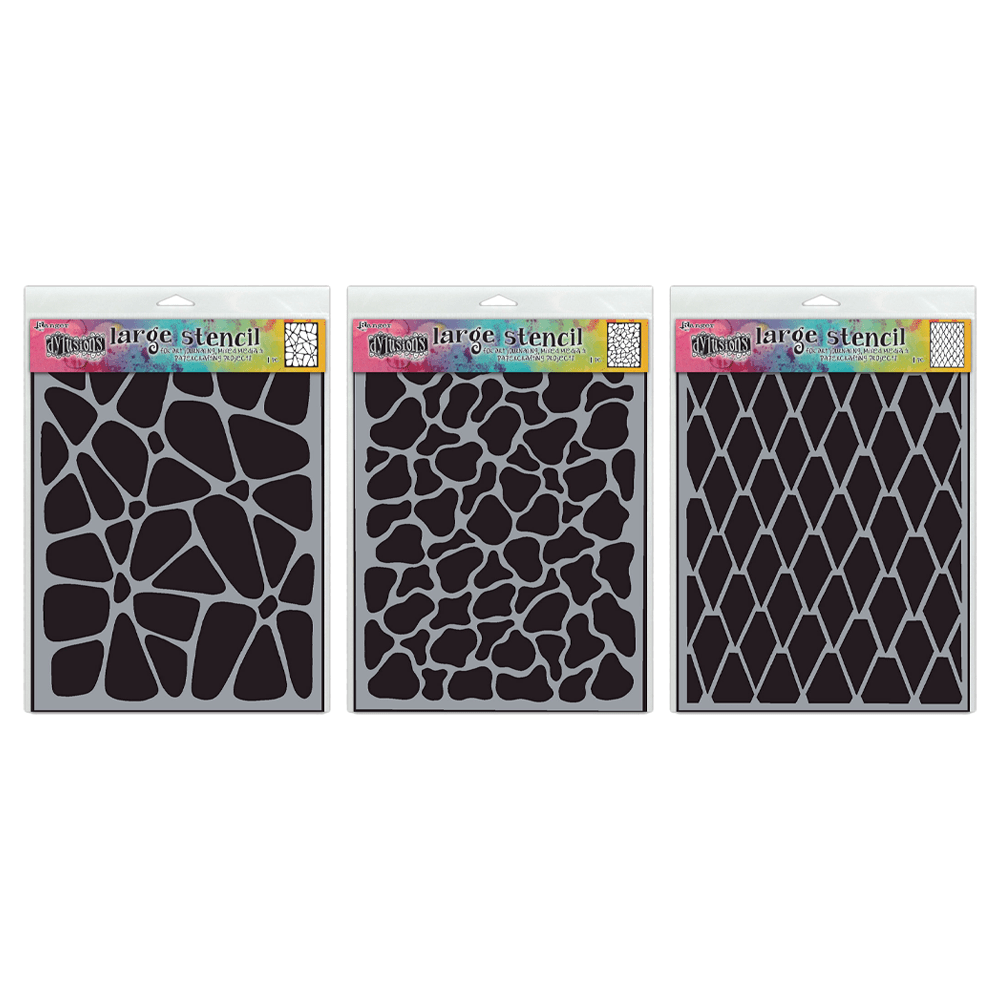
- Dylusions Stencils: 5x8-Chequered Dots, Starry Starry Night, 9x12-Annie
- Ranger Craft Scraper
- Ranger Heat it™ Craft Tool
- Dylusions Ink Sprays: London Blue, After Midnight, Black Marble, White Linen
- Ranger Mister
- Ranger White Opaque Pen
- Tim Holtz® Distress Ink Pads: Black Soot
- Ranger Ink Blending Tool & Foam
- Dreamweaver Wendy Vecchi Embossing Paste in White and Metallic Silver
- Stamper
- Tim Holtz by Tonic Studios-Kushgrip Snips, Paper Distresser Tool
- Tim Holtz Idea-ology Crinkle Ribbon, Mini Paper Clips, Mirrored Stars
- Black Cardstock (witch
- Stabilo All Pencil
- Toothpick
Instructions
1. Stamp the three background images randomly onto the #10 Manila Tag using Jet Black Archival as dark as you can get the images (Mini Fancy Scroll Work, Mini Halloween Script & Diamonds).

2. Arrange the Dylusions Chequered Border Stencil along the left edge and bottom of the tag and secure it with tissue tape to a Non-Stick Craft Sheet. Working quickly, use the White Embossing Paste and Craft Scraper by applying the Paste through the Chequered portion only, and stopping about 2.5 inches from the top left of the tag. You want a thick enough coat that you can’t see the Manila through the Paste, but you want the Paste level with the stencil as well. Place any unused Paste back in the jar and close it up. Remove the tape, and carefully remove the stencil. It must be cleaned now before the Paste dries on it. If you got any Paste anywhere on the tag where you don’t want it, now is the time to remove it with a napkin or rag. You can let this dry naturally, about 10-15 minutes, or give it a light drying with the Heat It Tool. The Paste will puff slightly with the heat, but still remain soft and pliable.

3. Remove the smallest (inside or positive) Annie Stencil from the trio of Annie’s, and set her aside, as you will use her later. Place the stencil (outer or negative) on the tag, with the smallest Annie on the right side of the tag. Her feet should be just above where the Chequered portion was stenciled in, and her right arm is against the right side of the tag. Remember, she will be facing away from you, so you are seeing the back of her. It is important to keep this frame of reference in your head. Use tissue tape to fix the stencil down so it doesn’t move. Again, apply the White Embossing Paste into the Annie Stencil, and this time you can be a little heavier with it as this is a very open figure. Remove carefully and clean up. Air dry Paste or use Heat It Tool.

4. Using the Starry Night Stencil, find a larger star that will fit nicely in the upper left corner of the tag. Tape the stencil down, making sure to cover up any close stars so Paste does not get into them. This time use the Metallic Silver Embossing Paste. It is denser than the White Paste, so it doesn’t take much. Just a thin coating will do. Carefully remove the stencil and clean up. You will want to dry this with the Heat It Tool, because you need to repeat this process a few more times, but using much tiny stars. I did five total scattered across the top portion of the tag, drying each before moving on to another.

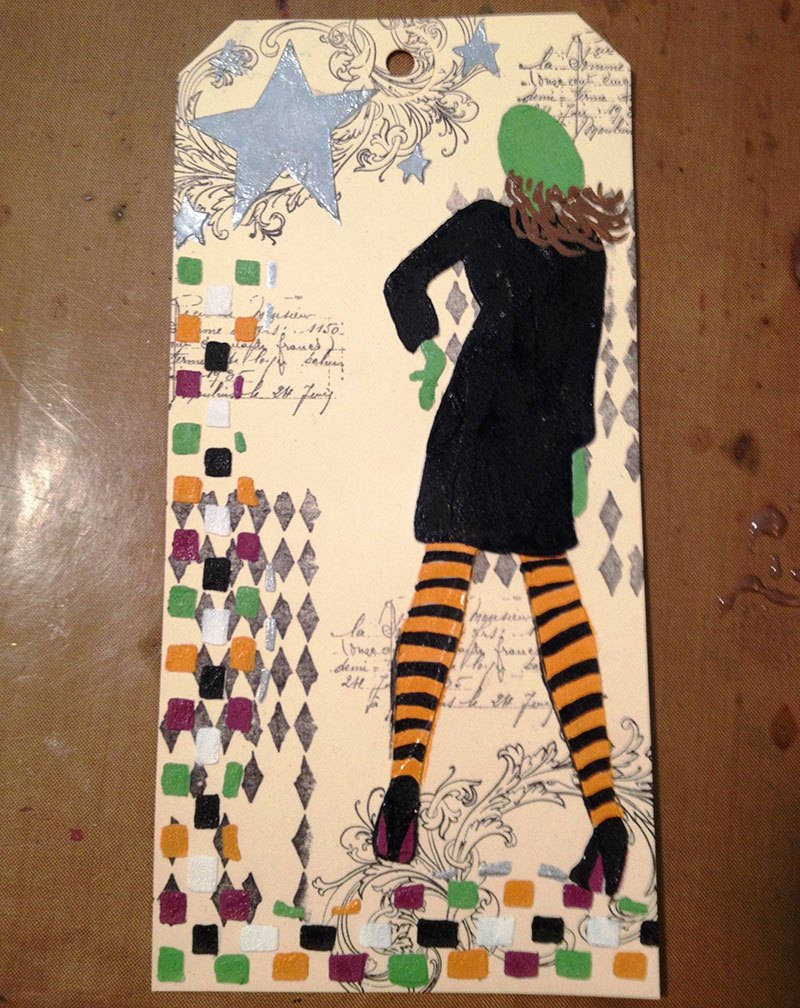
5.Here is what my tag looked liked when all the stenciling was finished.

6. Gather your Distress Paints and a very fine bristled paint brush. Use one paint at a time, and shake it up….all Distress Paint must be shaken up well. Apply a dauber squeeze of paint directly to the craft sheet. A little goes a long way, so not too much. Load your brush up and paint directly onto the dried Embossing Paste, making sure to get the sides of whatever you are painting as well. The Paste takes the paint so well, and doesn’t change the soft texture of it. When you are ready for another color, just clean your brush with a little water squirt, and begin again until all the Paste is covered. You can use your Heat It Tool at any time to dry the paint.

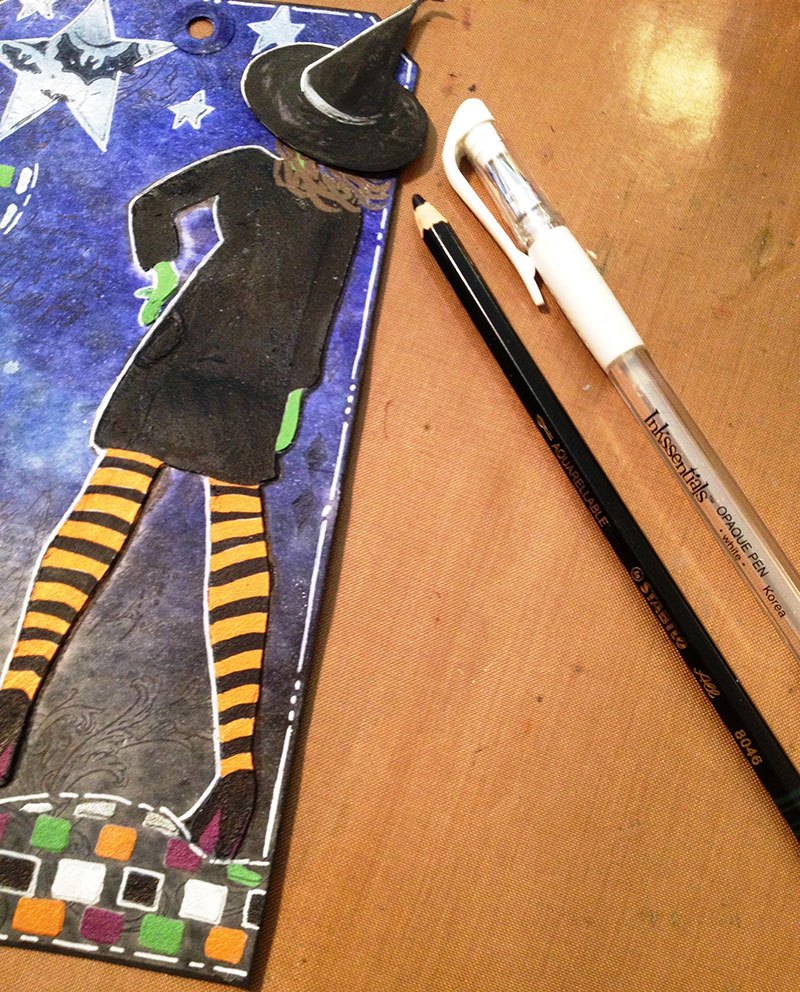
7. Here is everything all painted in. I added strings of hair using Walnut Stain Distress Paint, and to really make this a rear view, I painted in the high heels and colored soles of the shoes.
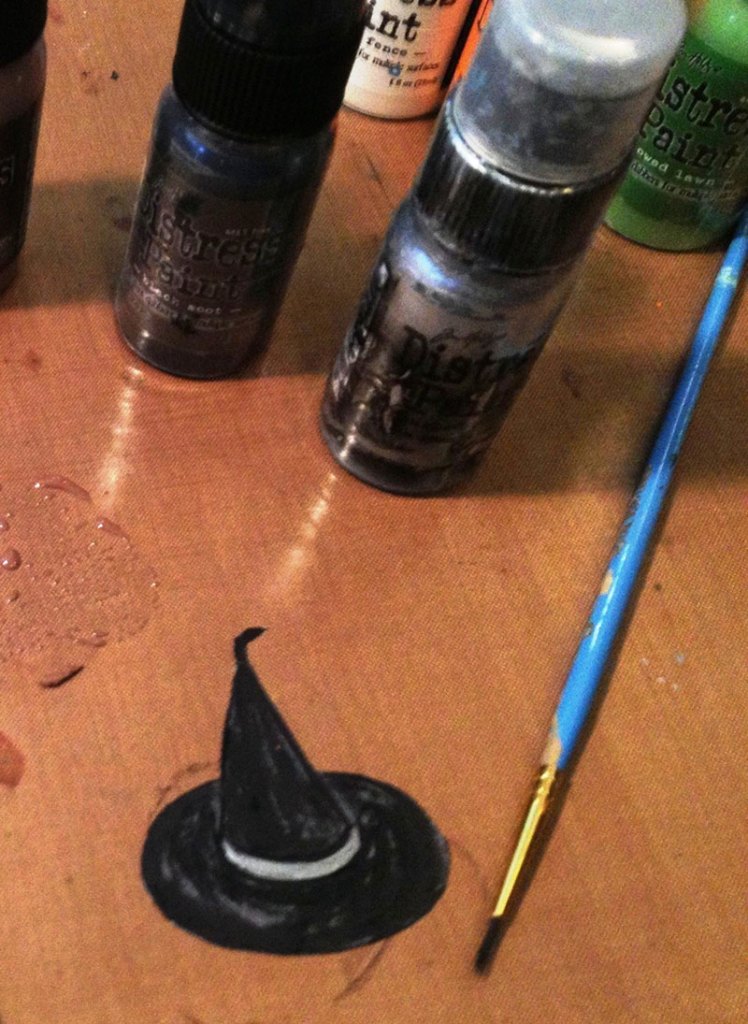
8. Freehand cut a witch’s hat onto black cardstock, cut out, and highlighted with Distress Paint. Here is picture pattern with the dimensions of the hat I made.

9. Have London Blue, After Midnight, and Black Marble Dylusions ready to spray, as well as a water mister and paper towels or a clean rag. This part will seem scary, but this is where your resist is going to happen. Start with the London Blue. Spray a stripe of it horizontally in the middle of the tag about 3 inches wide. Next, spray After Midnight on the top portion of the rest of the tag, and spray Black Marble on the lower portion. Use your rag or paper towels to soak up the spray. Just like magic, the Dylusions resisted the painted Embossing Paste! How cool was that?!?
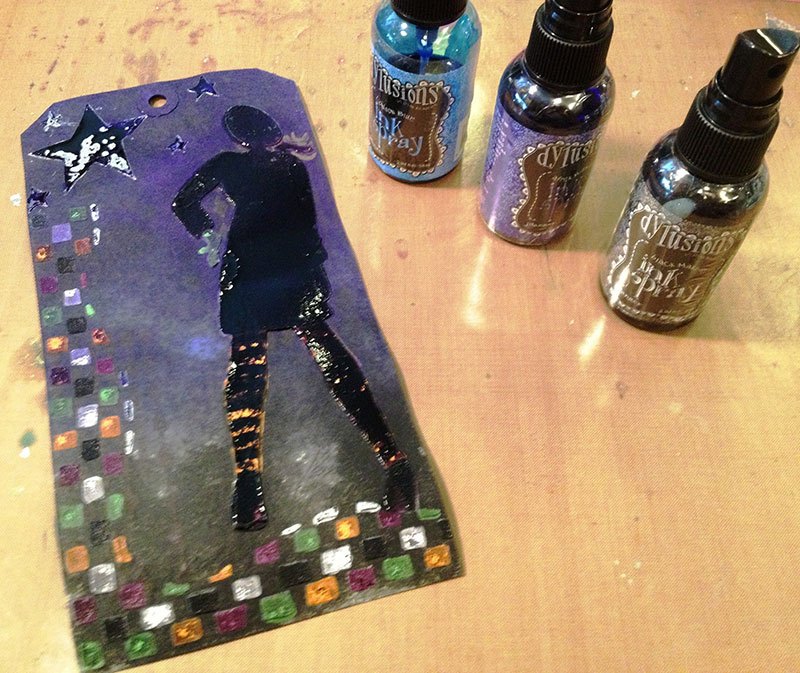
10. The tag is very dark while wet, and still much too dark to see the background stamping, so now is the time to remove some of the Dylusions. Use your water mister and rag to remove as much of the Dylusions as you wish until you get the desired background look you want, and then dry your tag thoroughly with the Heat It Tool.

11. Find the smallest positive Annie Stencil that you set aside, and then lay her over the painted witch image on the tag. Take the White Linen Dylusions and shake it up very well. Then holding it up about a foot above the top portion of the tag, spray the ink once lightly so that it puts forth a fine mist of tiny white dots on the starry part of the tag. Use a paper towel to clean any white mist from any painted checks on the border part.

12. Use a White Opaque Pen to highlight the parts of the witch and hat that the stars are shining on, as well as draw a border around the tag, the stars, and the Chequered border. You can also use a Stabilo Pencil to add shadowing on the darker side of the witch where the stars are not shining. Shake up the Black Soot Distress Paint again, and swipe it over the tag edges to add a nice dark shadow border as well. Affix the witch’s hat somewhat sideways as if she is looking up, using Pop it Shapes. Add a wand with a toothpick, complete with Mirrored Star at the tip.
13. Shake Mowed Lawn and Seedless Preserves Distress Paint and paint small portions of a scrap piece of manila paper with each one. Use a paper towel and swipe up the wet paint from the manila. Stamp the Halloween Ticket and Star Sentiment in Jet Black Archival onto the colored manila. Cut these out. Distress the edges of the ticket, and ink them and the sentiment edges with Black Soot Distress Ink. Mist the ticket with a little Perfect Pearls Mist, and then attach it the tag using a Mini Paper Clip. Cut the sentiment apart and glue it onto the tag, on the witch’s body. Stamp the bats onto the largest star using Jet Black.

14. Cut a piece of Crinkle Ribbon about a foot long. Shake Spiced Marmalade Distress Paint, and add a little bit of the paint to the ribbon here and there. Mist the ribbon with water and scrunch it up. Dry it somewhat with a Heat It Tool. Use a Happy Halloween image and randomly stamp it Jet Black on both sides of the ribbon. Mist the ribbon lightly with Perfect Pearls Mist, and dry thoroughly this time. Affix it to the tag.

Related Posts

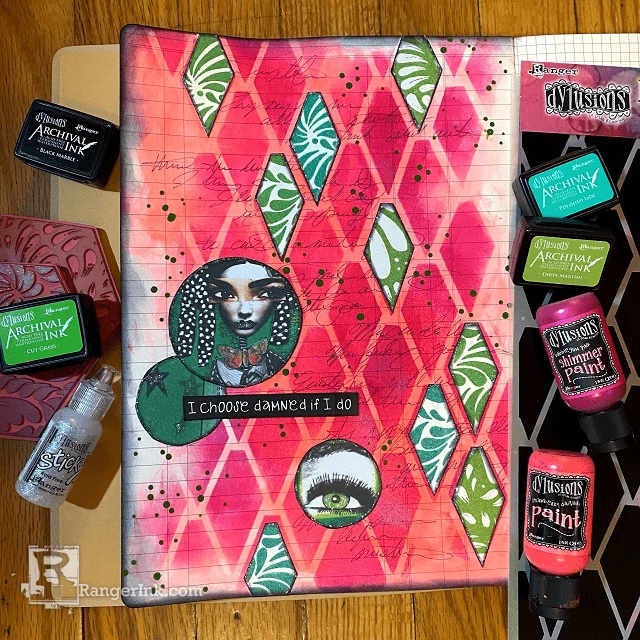
Dylusions Archival Ink Damned If I Do Journal Page by Jess Peters
Explore the latest Dylusions products in this journal page tutorial with Jess Peters! Crafted in the new Large Ledger...
Read More
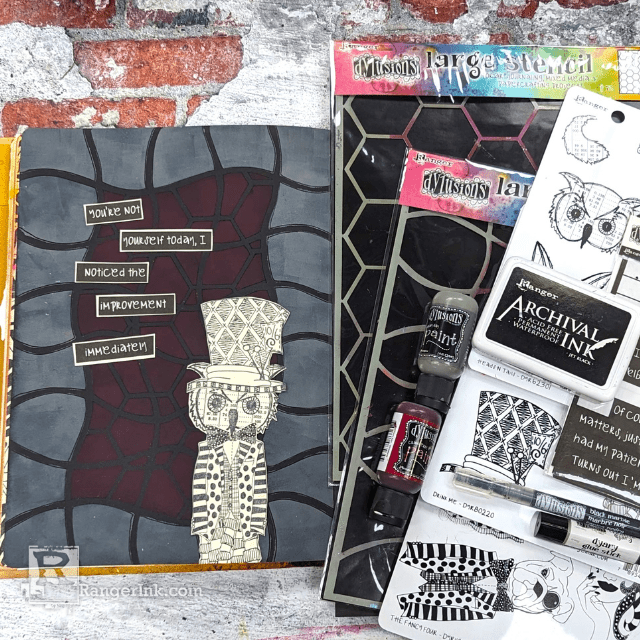
Dylusions Layered Stencil Journal Page by Denise Lush
Check out this cool Dylusions journal page tutorial by Denise Lush! Follow along as she demonstrates the art of...
Read More