


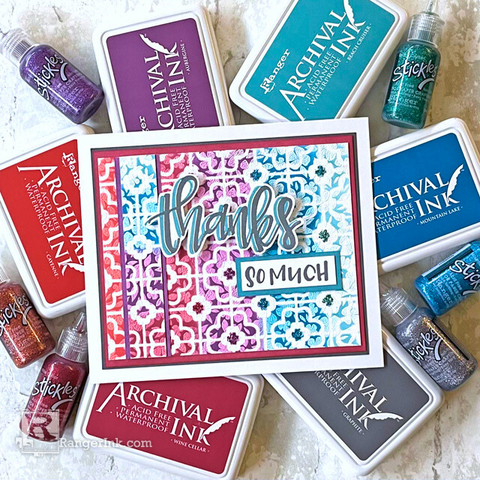
Gear up for a burst of colorful inspiration! Join Lauren Bergold in celebrating the arrival of the latest Archival Inks & Stickles as she crafts a vibrant Thank You Card.

Archival Ink & Stickles Thanks So Much Card by Lauren Bergold
- Materials
- Instructions
Archival Ink™ Pads: Beach Cruiser, Wine Cellar, Cayenne, Aubergine, Mountain Lake, Graphite
Stickles™ Glitter Glue: Beach Cruiser, Wine Cellar, Cayenne, Aubergine, Mountain Lake
Simon Hurley create. Bitty Botanicals Background Stamp
Simon Hurley create. The Loo! Stencil
Simon Hurley create. Stark White Cardstock
Letter It™ Thank You Clear Stamp Set
Emboss It™ Clear Ink Pad
Embossing Powder White
Ranger Heat It™ Craft Tool
Wendy Vecchi MAKE ART Stay-tion
Wendy Vecchi MAKE ART Perfect Card Adhesive
Letter It™ White Foam Roll Tape
Ranger Mini Ink Blending Tool
Ranger Mini Ink Domed Replacement Foams
Instructions
The emboss/resist technique is one of my favorites, but this is the first time I've tried stenciling ON TOP... it won't be the last, however, because I'm hooked on the combination of bright color with soft texture!
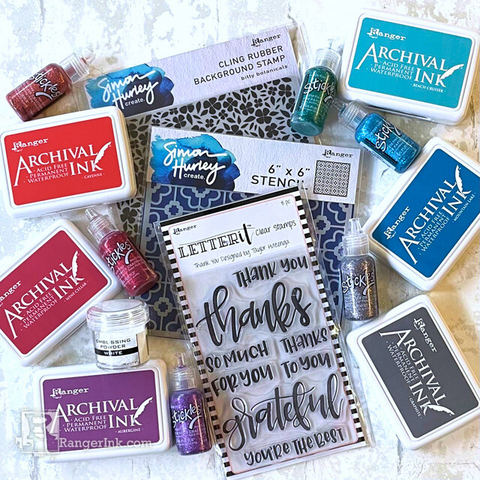
Step 1: Gather Supplies: Ranger Archival Inks in Cayenne, Wine Cellar, Aubergine, Mountain Lake, Beach Cruiser and Graphite; coordinating Stickles Glitter Glues; Simon Hurley create Bitty Botanicals Background Cling Stamp, The Loo! Stencil and Stark White Cardstock; Letter It Thank You Clear Stamp Set; Emboss It Clear Embossing Ink Pad; Ranger White Embossing Powder.
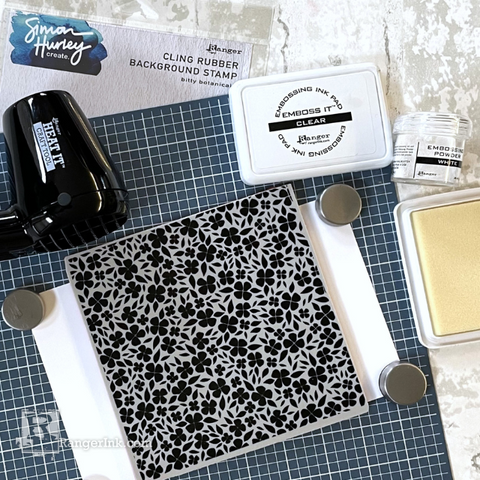
Step 2: Stamp the Bitty Botanicals Background in Emboss It clear embossing ink on Simon Hurley create. Bright White Cardstock. Sprinkle with Ranger White Embossing Powder, tap off excess, and melt powder with the Heat It Craft Tool. Set aside and allow to cool completely.
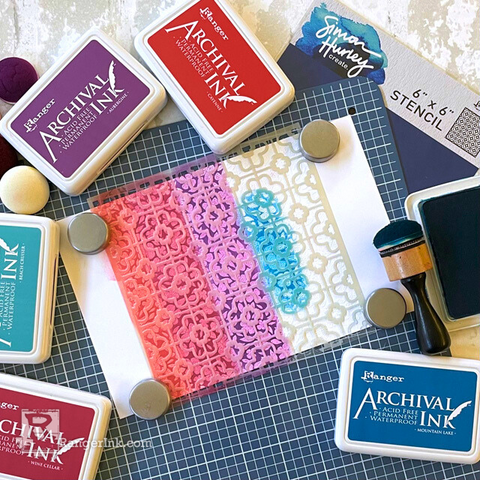
Step 3: Use the magnets from Wendy Vecchi's MAKE ART Stay-tion to secure Simon Hurley's The Loo! stencil firmly on top of embossed panel. Use a Mini Ink Blending Tool and Domed Foam to apply one Archival Ink color to each vertical row of tiles, in the following order: Cayenne, Wine Cellar, Aubergine, Mountain Lake and Beach Cruiser. DO NOT wipe the excess ink from the embossed pattern.

Step 4: Trim the embossed panel to 4.5 x 5.5" saving the offcut for later. Apply coordinating colors of Stickles Glitter Glue to the small flowers between each set of embossed tiles on the large panel. Set aside on a flat surface and allow to dry completely.

Step 5: Using the Letter It Thank You Clear Stamp Set, stamp "Thanks" in Graphite Ink on white cardstock and allow to dry for a few seconds before repositioning the stamp just slightly to the left, and stamping a second time in Beach Cruiser Archival. Cut out neatly around the word using scissors. On a separate scrap of cardstock, stamp "So Much" in Graphite, then trim into a neat strip measuring approximately 5/8 x 2".

Step 6: Trim a piece of Simon Hurley create. Stark White cardstock to 4.75 x 5.75" and apply Wine Cellar Archival Ink around the edges. Trim another piece of white cardstock to 5 x 6" and apply Graphite Archival Ink around the edges.Trim the offcut piece of the embossed panel to 5/8" and mat it on a 7/8" scrap of white cardstock that's been inked with Aubergine Archival. Mat the "So Much" sentiment on a scrap of white cardstock approximately 7/8 x 2.25" inches that’s been inked in Beach Cruiser Archival.
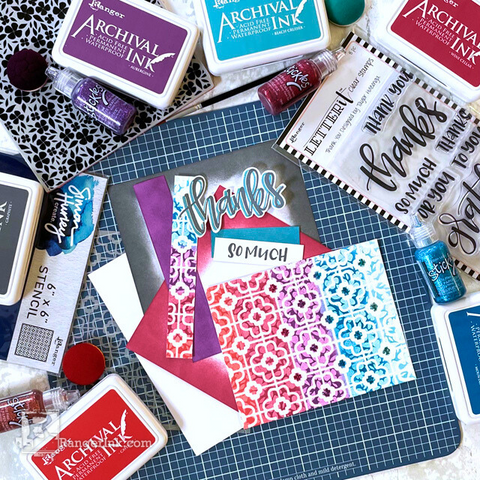
Step 7: Assembly: Add the Aubergine-matted offcut to the left-hand side of the embossed panel, as pictured, using Perfect Card Adhesive. Trim off the excess at top and bottom. Mat the embossed panel on first the Wine Cellar panel, and then the graphite panel, using Perfect Card Adhesive. Add the "So Much" sentiment flat as pictured, and mount the cut out "Thanks" just above, on small pieces of Letter It White Foam Roll Tape. Affix the finished design panel to a 5.5 x 6.5” white card.
Step 8: Stamp an additional sentiment on the inside, if desired; sign the card and address to a favorite friend who could use some happy mail. Send it ASAP and prepare to make their day!
 My name is Lauren Bergold, and I live in central New Jersey with my husband of 30+ years and A LOT of art supplies! My favorite medium is paper, and I especially love making cards. I teach papercrafting classes, as well as collecting and compiling vintage and found papers. You can find me on my blog, All the Good Blog Names Were Taken, and on Instagram as @llaurenb where I love to connect with other artists and makers!
 Related Posts

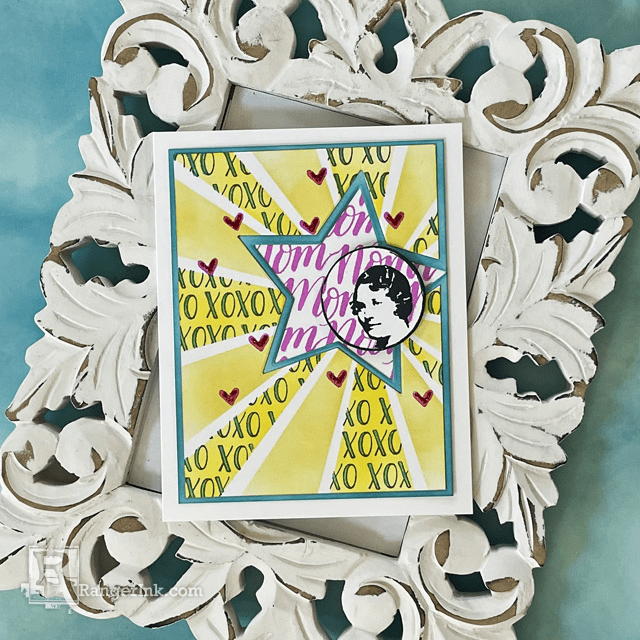
Archival Ink Mother's Day Card by Lauren Bergold
With Mother's Day just around the corner, it's time to go above and beyond for the special women in our...
Read More
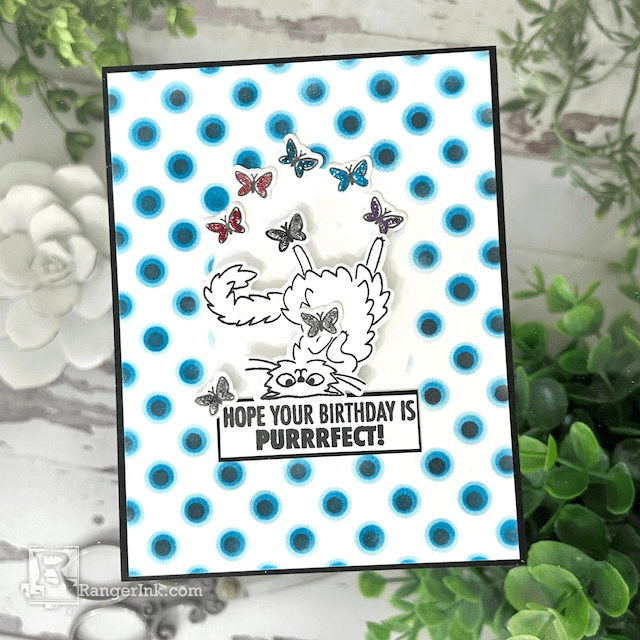
Archival Ink & Stickles Birthday Card by Kimberly Boliver
Purrfect Birthday Wishes! In this tutorial, Kimberly Boliver uses the latest Archival Inks and Stickles to whisker up a birthday...
Read More