


Make this stylish tag that is well-dressed in Archival and Distress Inks.

Archival Ink Dry Goods Tag By Linda Cain
- Materials
- Instructions
- Ranger Non-Stick Craft Sheet™
- Ranger Heat it™ Craft Tool
- Tim Holtz Distress® Ink Pads
- Archival Ink™ #0 Pads
- Tim Holtz® Idea-ology® Hanger Clips
- Tim Holtz® Idea-ology® Tissue Tape - Journeyman
- Tim Holtz® Alterations™ by Sizzix® Vagabond machine
- Tim Holtz® Alterations™ by Sizzix® Mini Scallop & Pinking Die
- Stampers Anonymous Tim Holtz® Collection Stamp Sets Haberdashery
- Black chipboard
- Small silver snaps
- Adhesive rhinestones
- Black gel pen
Instructions
(1) Working on the Non-Stick Craft Sheet, apply Distress Inks to large Manila tag starting with Mustard Seed in the center and working your way around the tag blending the other colors as you like.
(2) Cut the bottom of the tag off with the Mini-Scallop Die.
(3) Cut a Tag from black chipboard. Trim a tiny bit of the Manila tag all around to make it slightly smaller than the black tag.
(4) Stamp the Gold Eye Needle stamp at the top with Rose Madder and the bottom with Coffee Archival Inks.
(5) Use the 2 Thread Spool stamps to add Viridian, Venetian Orange, and Ultramarine Blue.
(6) Stamp the Needle Book stamp as shown with Sepia.
(7) Add the Tissue Tape to lower portion of the tag.
(8) Stamp the Dress Form with Jet Black Archival Ink on the right side of tag. Heat set over Tissue Tape.
(9) Add a tiny bit of Venetian Orange to a piece of Lavish Trimming cut in half for a touch of vintage color. Rinse with water to tone down and dry. Glue to Dress Form.
(10) Poke 3 holes with Craft Pick and add snaps.
(11) Glue the Manila tag to the black chipboard tag.
(12) Add the Hanger Clips and Fanciful Accoutrement.
(13) Add rhinestones, pen marks and a coordinating bow.
Related Posts

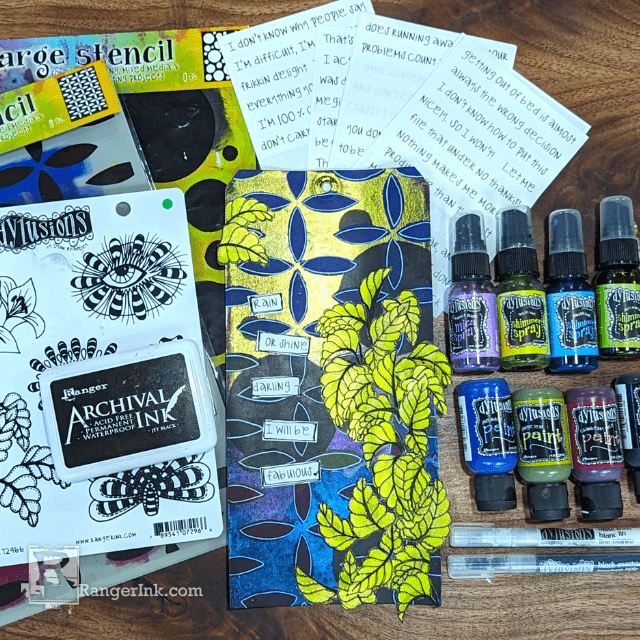
Dylusions Shimmer Spray Tag by Denise Lush
Unleash a world of shine! Check out Denise Lush's latest creation using the enchanting Dylusions Shimmer Sprays and...
Read More
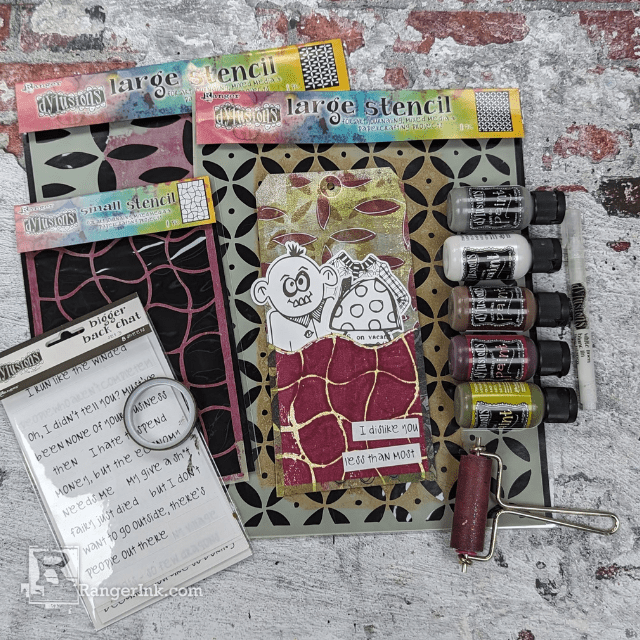
Dylusions Brayered Background Tag by Denise Lush
Check out Denise Lush's tutorial on crafting this cool, grunge-inspired Dylusions Brayered Background Tag! Follow along as she uses the...
Read More